Android: How to setup sandboxed Ingress user using GrapheneOS
Overview
Acknowledgements
The guide assumes one knows how to create a secondary profile on Android1. The procedure may be adjusted for other phone models and operating systems. The guide also includes Work In Progress (WIP) sections, which are placeholders for potential upcoming modifications and are too valuable not to publish, although not fully thought out.
Quick setup
After setting up a new profile1, install the Google Play Store and Google Play services from GrapheneOS' App Store.
In the Google Play Store, search for Ingress or use https://play.google.com/store/apps/details?id=com.nianticproject.ingress.
Make sure to permit the various functional services required for the app to work, which are presented through notifications either during installation or later when playing.
The required services from Google Play services are Network and Sensors. If one wants background GPS movement tracking, then activate Physical activity and Health, fitness and wellness. (Scanning portals are currently buggy to setup.)
Login or sign up for Ingress and enjoy playing!
Additional setup
The Ingress map's background is black; thus, depending on the phone model, it might be difficult to play in the bright sunlight.
One phone setting that may help with it is the Colour inversion setting.
Activate it by going to the phone settings and search for Colour inversion. Then one can turn it on. Even better is to setup Quick Settings, which then makes it accessible in the tiles when one pulls down from the top of the screen.
Ingress basics
Ingress players are required to perform five actions consisting of two primary and three secondary actions, each paired with its own item.
The primary actions are
- movement, and
- hacking2.
The secondary actions are
- combat paired with Weapons,
- deployment paired with Resonators, and
- linking paired with Portal Keys.
The primary actions do not require any items, whereas the secondary actions do.
Movement up to 60 kmph is registered. Thus, one can walk, run, bike, ride in a bus, etc.
Hacking is the action to acquire items. These consist of and are not limited to the items mentioned in the secondary action pairs. Hacking is done by tapping on a Portal3 in reach and choosing the hacking option. There are two forms of hacking: the normal one and Glyph Hacking, with the latter increasing the amount of items. To Glyph Hack, one long-holds on the hacking button and swipes towards the Glyph Hack option.
The items4 are
- Media
- Mods:
- Portal Shield
- Force Amp
- Turret
- Heat Sink
- Multi-Hack
- Link Amp
- ITO EN Transmuter
- Resonator
- Power Cube
- Capsule
- Portal Key
- Weapons:
- XMP Burster
- Ultra Strike
- ADA Refactor
- JARVIS Virus
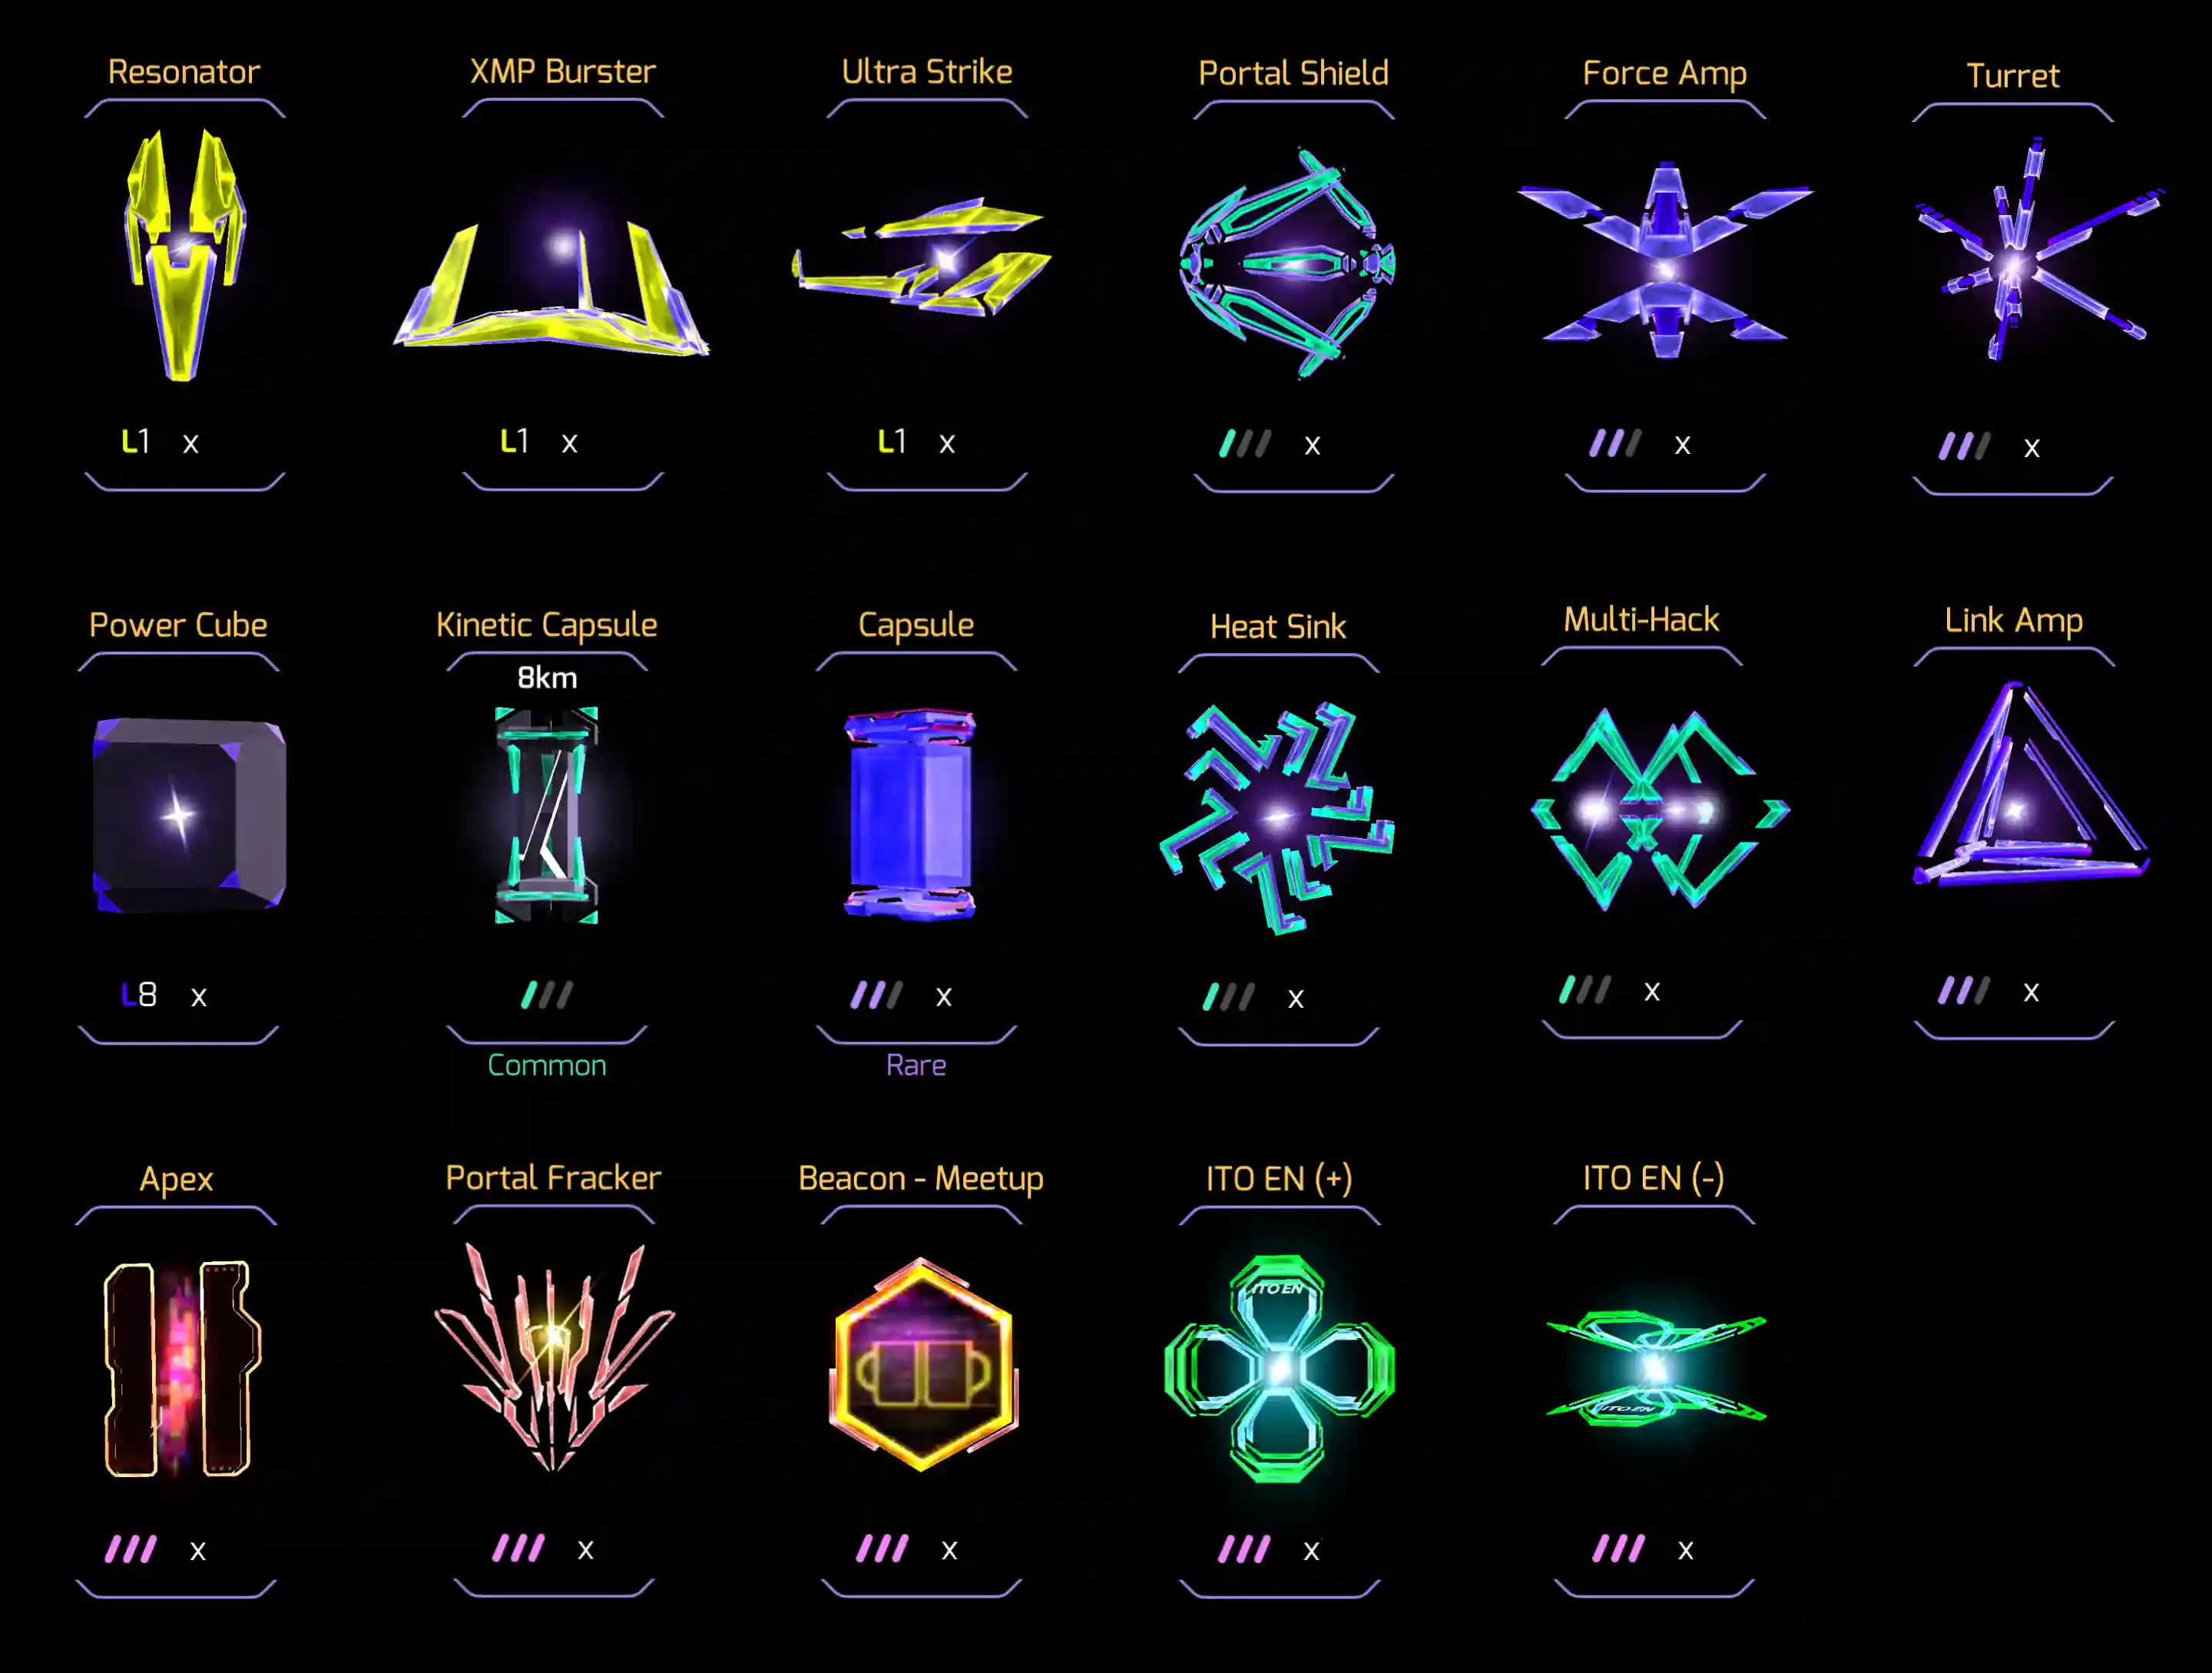
Combating is required when one wants to remove either Resonators or Mods from a Portal.
Deploying is required when one wants to use the Portal as a node for Linking. Hereby, the Portal needs to have 8 Resonators. Each Resonator provides a specific range:
| Resonator Level | Link Range |
|---|---|
| 1 | 20 m |
| 2 | 182.5 m |
| 3 | 1.38 km |
| 4 | 4.62 km |
| 5 | 9.83 km |
| 6 | 21.63 km |
| 7 | 33.52 km |
| 8 | 54.42 km |
And the maximum ranges one player, aka Agent, can achieve without Mods are
| Agent Level | Resonator Level | Link Range |
|---|---|---|
| L1 | L1 L1 L1 L1 L1 L1 L1 L1 | 160 m |
| L2 | L2 L2 L2 L2 L1 L1 L1 L1 | 810 m |
| L3 | L3 L3 L3 L3 L2 L2 L2 L2 | 6.25 km |
| L4 | L4 L4 L4 L4 L3 L3 L3 L3 | 24.0 km |
| L5 | L5 L5 L4 L4 L4 L4 L3 L3 | 40.9 km |
| L6 | L6 L6 L5 L5 L4 L4 L4 L4 | 81.4 km |
| L7 | L7 L6 L6 L5 L5 L4 L4 L4 | 110.3 km |
| L8 | L8 L7 L6 L6 L5 L5 L4 L4 | 160.1 km |
Only the source Portal needs to be in range of the target Portal.
Linking is required when one wants to connect two Portals together. Hereby, one needs to tap the source Portal and have the target Portal's key, plus the target Portal needs to be in range of the source Portal, and there cannot be any potential intersecting Links.
When one achieves to Link three Portals together such that they produce a triangle, a Control Field5 (or short a Field) is made. This Field provides Mind Units (MUs)6, which are the units used for scoring within Ingress.
The goal of the Faction is to have the highest MU count. Thus each Agent's task is to contribute to the score to the best of their ability.
There are many overarching strategies aka play-styles, that an Agent can enact and 1-to-many tactics to achieve the strategy.
The guide shall provide some methods to aid in the planning phase before going out in the field and enacting the tasks to achieve the tactic and further the strategy.
Ingress primary tools
Ingress players use three primary tools:

Telegram
The in-game Ingress chat is not the safest way to communicate with one's faction; thus, the community has decided that the default form of communication is via Telegram. A more hardened version of Telegram is called Forkgram7; it comes with a wide range of additional features.
Lots of players align their in-game Ingress username with their Telegram username to quicken the lookup process.
Playing Ingress alone may be sufficient for some players, but playing in a community opens the door to a wide range of knowledge and experiences.
For example, lots of locations host an Ingress First Saturday8 event and more detailed information is communicated through Telegram.
An Ingress First Saturday event is a two-hour window on the first Saturday of each month, where registered players get twice as much AP (Ingress' version of XP). Additionally, there is a leaderboard over various metrics, with the best players getting additional items.
It is a good way to meet local and visiting players, plus one might discover new places in the location.
IITC
IITC9 is a tool that may aid in planning to create Fields. It expands the Ingress Intel Map10, and its strength comes through the official and unofficial plugins.
On desktop, the recommendation is to install ViolentMonkey11, and on mobile through the F-Droid store. The reason to choose both is that it is easier to draw the fields in the browser where the user typically has a bigger viewing window (monitor) than on mobile; though, performing the actions differs based on the system.
For drawing the Fields, get the plugins (which are ViolentMonkey user scripts):
- Draw tools
- Cross links
- Done links
Further to have similar* map data, get the Map Tiles: OpenStreetMap.org map. This eases the need to context switch between the latter OsmAnd12 map and IITC. To activate the map, go to the layers icon and choose the Base Layer. On desktop, the list pops up on hover and is located to the left. On mobile, navigate to the three dots on the top right, choose Layer Chooser, and then the drop-down arrow in the Base Layer section.
To aid in the reduction of reloading data, get the Cache plugin for both desktop and mobile.
Further plugins are based on personal needs and play styles.
NB: Key differences between mobile and desktop are that on mobile, one clicks at the bottom of the screen on the text to open the details, whereas on desktop, one is presented with a side-panel.
Ingress strategy planning
Glyphs
Glyphs13 have become a core part of the game.
Glyphs are the language of the Shapers (and presumably the N'Zeer), who seem to be authoring the crisis on Earth.13
Glyph hacking is an extended way of hacking a portal which may provide oneself with additional gear.
It further has its own medal, which is a good reason to become proficient in the symbols. At later levels, as of level 8, one needs specific medal colors to level up.

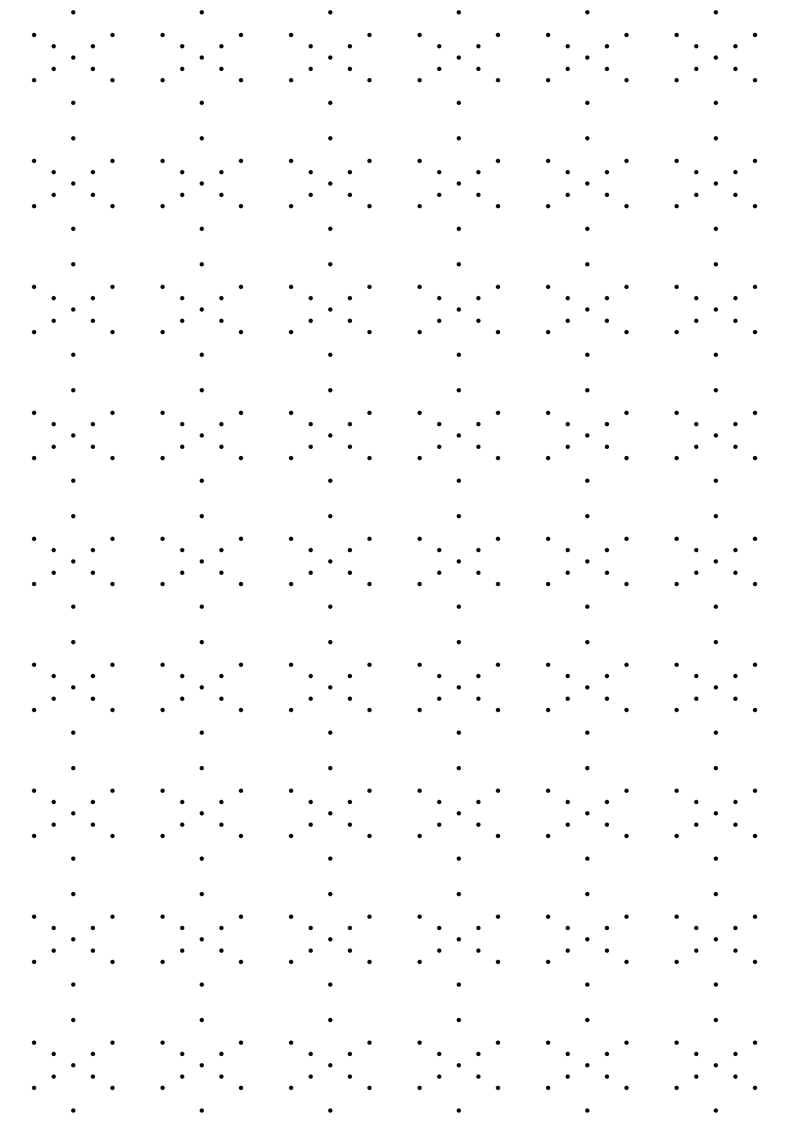
There exist various apps to learn the Glyphs, or one can use Anki cards14. If one chooses to use the Anki method, it is wise to take the time and draw out each Glyph. Either one can do this on the phone, tablet, drawing pad, whiteboard, or on paper. Just download the Calibration Grid Glyph, place it as the background layer (if applicable), and start drawing.
Variations:
- 9x6 calibration grid as SVG: Download as SVG
- 9x6 calibration grid as Xournal++: Download as XOPP
The reason why to learn the word-glyph pairing is that it is easier to memorize 1-5 words over 1-5 complex symbols.
Navigation
IITC has the plugin Overlay KML / GPX / GeoJSON, which permits loading navigation routes. On mobile, only GeoJSON is permitted using the .json extension. Occasionally, on mobile, one will need to reimport the navigation route.
To avoid these two bugs, it is better to have a dedicated app for navigation like OsmAnd12. OsmAnd has the benefit that the map is available offline, thus no additional internet in the field is required. If prior the Map Tiles: OpenStreetMap.org map was installed, then the map data between IITC and OsmAnd will be similar*.
Advanced: Planning Control Fields
It is assumed that one is performing Advanced Control Field Δ Building15. Further, one is familiar with the tools:
- IITC9 and plugin
IITC Ingress Portals Exporter16 - OsmAnd12
- uMap17
- python18 developer environment
- open map maker19
- terminal
Procedure to get required keys information onto OsmAnd
1. Draw the intended Control Fields
In IITC, draw the intended Control Fields following the Advanced Control Field Δ Building methods.
The DrawTools Opt has the option to Snap to portals; do this before exporting.
Export the data.
NB
To change the color, use sed via the terminal
1sed -i 's/#a24ac3/#<new_color>/g' <export_draw_control_fields>.json
This is vital if one wants different colors for the drawn objects when importing to IITC on mobile or a secondary device.
2. Grab the Portals coordinates
In IITC, with the plugin IITC Ingress Portals Exporter, export the Portals used for the drawn Control Fields as CSV. This is done by copying the CSV and pasting it into a file with extension .csv.
NB: CSV is better than JSON because it will make further data processing easier.
NB
To remove duplicates via the terminal
1cat <INPUT>.csv | sort -u > <OUTPUT>.csv
Or with software like LibreOffice Calc20, one may remove duplicate rows.
3. Align drawn intended Control Fields with Portals coordinates
Using python, create a vibe-coded script that aligns each way with a portal and counts how many instances. This count is the maximum required amount of keys needed to make links. If no instances exist, which could be the case when an existing Control Field exists, then make sure that the count is 0; otherwise, that portal data will be removed.
Make sure that the name column in the generated CSV file looks like <portal_name> - keys: <key_count>. Either do this directly via python or using LibreOffice Calc.
The name keyword is used as the label for both in uMap and OsmAnd; thus, all important information should be saved here.
4. Import CSV into uMap
Import the CSV into uMap. Adjust the styling to one's liking. uMap may be used as a secondary tool to make more concrete planning on which portals to capture and which to let die.
The main reason for importing into uMap is so that one can use its export to convert the data into a GPX file type.
5. Import GPX into OsmAnd
Import the GPX into OsmAnd and make sure to select it as Favorites. This will make each one its own item and easier to read and adjust to one's preferences.
Recap
Now one has the knowledge on how to...
- ...use multiple tools to process and visualize the various file formats.
- ...have multiple variants of the truth: in-game, IITC, uMap, and OsmAnd.
- ...have multiple options to navigate dedicated routes: OsmAnd or IITC.
- ...make navigation routes: Open Map Maker19 or OsmAnd.
Procedure to preset the GPX with OsmAnd settings
OsmAnd provides a lot of information by default, and adding the Portal data, one's planned out route of attack (RoA) will be drowned away. To aid against this, one can highlight the route by increasing the thickness or changing up the color.
The scenario assumes that one is doing the RoA planning on the desktop with a tool like Open Map Maker19.
1. Create the route of attack (RoA)
Go to the Open Map Maker19 app https://open-map-maker.vercel.app/map and draw the planned route.
Once done, click on the download button found towards the bottom left. Enter a file name and make sure to check Remove Control Points (won't highlight the control points later in OsmAnd). Then click on the Save button, which will download the planned route as a GPX file.
There are two upcoming procedures: Setup and Reoccurring.
The Setup procedure will need to be followed the first time, if and only if, one wants to visually see the choices that are being made. Otherwise, one can skip directly to the Reoccurring procedure, which utilizes opinionated settings.
In either case, one will need the files from https://codeberg.org/barefootstache/OsmAnd-Quick-Actions/src/branch/main/scripts:
- https://codeberg.org/barefootstache/OsmAnd-Quick-Actions/src/branch/main/scripts/osmand-extensions-default.xml :: opinionated settings
- https://codeberg.org/barefootstache/OsmAnd-Quick-Actions/src/branch/main/scripts/osmand-extensions-template.xml :: validator
- https://codeberg.org/barefootstache/OsmAnd-Quick-Actions/src/branch/main/scripts/preset_osmand_with_extensions.sh :: CLI tool
Setup procedure
2. Get the OsmAnd extensions properties
Import the GPX file into OsmAnd, adjust it visually to one's liking, and export it back out.
To reduce confusion later, the original GPX is denoted as GPX-A and the one exported from OsmAnd as GPX-O.
NB: If one compares the two files, one will notice that the one from OsmAnd is larger in file size compared to the one imported. This is due to OsmAnd appending its extensions properties, which shall be utilized in the next step.
NB: The naming choice of the GPX files is reflective of OpenStreetMap field surveying notes, which uses a as alpha aka start, and o as omega aka end.
3. Extract the OsmAnd extensions properties
Open GPX-O with a text editor, scroll to the bottom, extract the <extensions> block, and overwrite osmand-extensions-default.xml. Now one has one's own opinionated settings.
The file looks like
 1<extensions>
 2  <osmand:show_arrows>true</osmand:show_arrows>
 3  <osmand:show_start_finish>true</osmand:show_start_finish>
 4  <osmand:split_interval>1000.0</osmand:split_interval>
 5  <osmand:split_type>distance</osmand:split_type>
 6  <osmand:line_3d_visualization_by_type>none</osmand:line_3d_visualization_by_type>
 7  <osmand:line_3d_visualization_wall_color_type>solid</osmand:line_3d_visualization_wall_color_type>
 8  <osmand:line_3d_visualization_position_type>top_bottom</osmand:line_3d_visualization_position_type>
 9  <osmand:vertical_exaggeration_scale>2.1</osmand:vertical_exaggeration_scale>
10  <osmand:elevation_meters>1000.0</osmand:elevation_meters>
11  <osmand:color_palette>default</osmand:color_palette>
12  <osmand:color>#EECC22</osmand:color>
13  <osmand:width>medium</osmand:width>
14  <osmand:coloring_type>solid</osmand:coloring_type>
15</extensions>
NB: Some colors work better in dark theme while others work better in light theme. Play around until one finds one that fits best to one's liking.
4. Append the OsmAnd extensions properties
Run the script
1sh preset_osmand_with_extensions.sh <GPX-A>.gpx
Validate that GPX-A and GPX-O are the same.
5. Import the new file to OsmAnd
Import the newly created file back to OsmAnd.
Reoccurring procedure
Let the GPX file from Open Map Maker19 be denoted as open-map-maker.gpx.
Run the script
1sh preset_osmand_with_extensions.sh open-map-maker.gpx
Import the open-map-maker.gpx file to OsmAnd.
NB: The preset_osmand_with_extensions.sh script has a wide range of options, which are presented by using the --help option.
WIP: Procedure to get keys from Ingress to data presenters
Idea:
- record the screen
- evaluate the frames with OCR
- cross-link the data with the existing CSV
- update the various data presenters
WIP: Procedure in choosing best Portals to capture
Idea:
- evaluate which forms of travel players use, like public, bike, foot
- evaluate the convenience of getting to each portal
- create a map that highlights different levels of convenience, e.g., public buses travel slow enough to capture vel attack Portals on its route
- with all the data present, create an action plan for each Portal one is willing to capture
Footnotes
* The reason for similar and not same map data is that it depends which version of the mapping is being used. It can be that someone is currently contributing to the OpenStreetMap21 project in the area and the map tiles are being updated quicker in IITC over OsmAnd (which is typically once a month).