Pokemon GO

If you want to do something long-term and have been struggling to do it yourself, an accountability partner can help you. Now if this partner is an actual person or an app makes little to no difference as long as the outcome is the same. Thus in mid-August after long consideration I decided to get Pokemon GO1.
Pokemon GO is an ARMG (Augmented Reality Mobile Game) that is GPS based. It was launched in 20162 and is a free-to-play with a freemium model.
The point of the game is to catch Pokemon and strengthen them while tending to other activities. The game can in theory be played without moving an inch, but if you want to catch all the Pokemon which now extends to 6002, you definitely have to go outside and move around.
(*) All Pokemon GO images are copy-right by them and the images are used for visual acknowledgement.
If you are an avid player, then don’t hesitate to jump ahead.
How to Pokemon GO
Activities
There are lots activities to choose from:
- catch Pokemon
- train a buddy,
- battle in gyms,
- participate in raids,
- hatch eggs,
- battle players and Team GO Rocket,
- trade Pokemon,
- learn about local history and attractions,
- do daily, field, and special research (quests)
- level up the player,
- have friends and send/collect gifts,
- etc.
These activities benefit each other and can simplify your experience.
First steps
It will take some time until the game play becomes more passive unless you want to invest money directly into the game.
Your first goal should be to reach level 5 because this is when you can efficiently farm PokeCoins which is the in-game currency for buying extension packs and items.
Once you have reached level 5, you want to go around your local area and look for Gyms. If your Team already owns the Gym and there is still space left, add your Pokemon to it. Otherwise combat the Gym and then place your Pokemon. By placing Pokemons in Gyms you collect PokeCoins. You get 1 PokeCoin per every 10min the Pokemon defends. These PokeCoins are first received, once the Pokemon has been defeated. You can only receive 50 PokeCoins per day.
Your next goal should be to expand your inventory. Since the starting size of 350, is definitely not enough space. It will take you 4 days of daily farming of PokeCoins to buy an expansion pack for either inventory or Pokemon slots (starts with 300 slots), each costs 200 PokeCoins. You want to get at least 1000 inventory slots and 500 Pokemon slots to create a more passive game play.
After that has been achieved the game becomes less intense and can be played less frequently.
The Basics
The basics are activities that you can do from home without the need to go outside.
Catching Pokemon
To simplify the catching experience, you should turn off the AR mode.
The size of the target ring gives the various throw types: Nice!, Great!, or Excellent!. Though only if you throw the PokeBall within the ring. These various types give various amount of XP as follows:
| Throw | XP Bonus |
|---|---|
| Nice! | 10 XP |
| Great! | 50 XP |
| Excellent! | 100 XP |
Beyond that you get:
| Other | XP |
|---|---|
| curve ball bonus | 10 XP |
| first throw bonus for catching Pokemon in one ball | 50 XP |
| capturing a Pokemon | 100 XP |
| a new Pokemon to Pokedex | 500 XP |
Thus the minimum amount you can get is 100 XP per Pokemon and the maximum is 760 XP. These values can be extended if a Lucky Egg is used, which doubles the XP gained within a time frame.
There is a daily streak for catching at least one Pokemon per day and maximizes the first catch of the day's XP on the 7th consecutive day and then resets.
Attack Phase
During the attack phase, you cannot catch the Pokemon and the [PokeBall][PokeBall] will be volleyed away.
If you have at least a Great Buddy, it can volley the PokeBall back towards the Pokemon that you are attempting to catch. This rebound will be aimed at the center of the Pokemon and thus can be an aid to achieve an Excellent! throw.
Dodge Phase
During the dodge phase, the Pokemon will change its position. Either it will jump up or fly to specific spots on the screen.
The Pokemon can still be caught during this action.
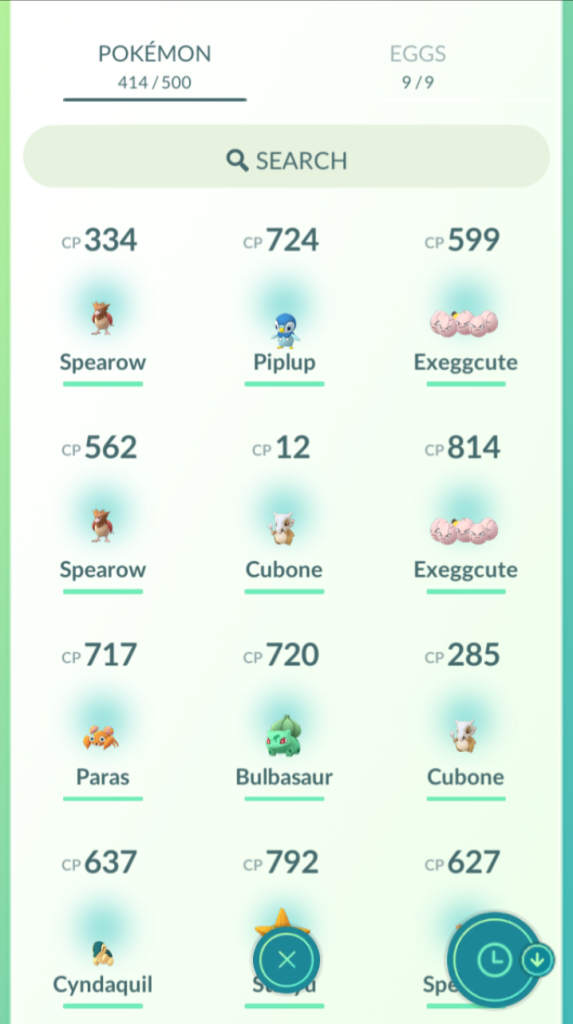
Transferring Pokemon
You will sooner or later run out of Pokemon slots, thus you will have to transfer Pokemons or buy an upgrade for more slots.
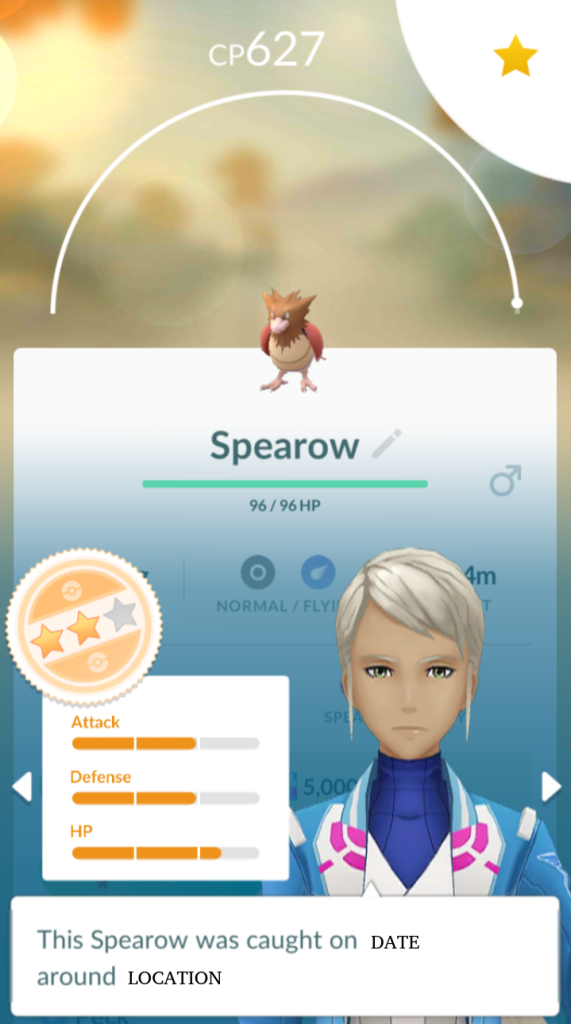
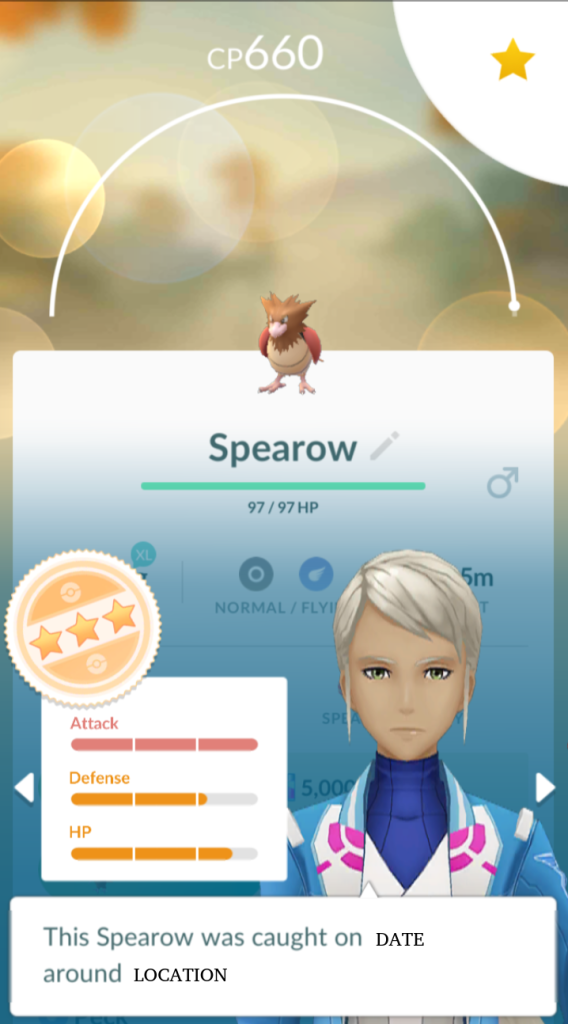
When choosing which Pokemon to transfer focus on their Appraisal status rather than their combat points (CP). The Appraisal status ranges from 0 to 4 stars. though one should mention, that higher CP will need less Candies to achieve their max CP, but the CP tells nothing about the quality of the Pokemon.
I originally made the mistake of transferring low CP Pokemon duplicates and only keeping the max CP Pokemon. Once I learnt about the Appraisal status, I already evolved these low quality Pokemon.
Ideally you want to transfer any Pokemon that don't have at least 3 stars.
Candy
When you transfer a Pokemon you get one Candy per transfer. Candies are used to increase the CP of a Pokemon, to evolve a Pokemon, or to learn a new attack.
Candies can be acquired by:
- catching Pokemon,
- extra Candies are given if using Pinap or Silver Pinap berries,
- transferring Pokemon,
- making the Pokemon a buddy and walking with it.
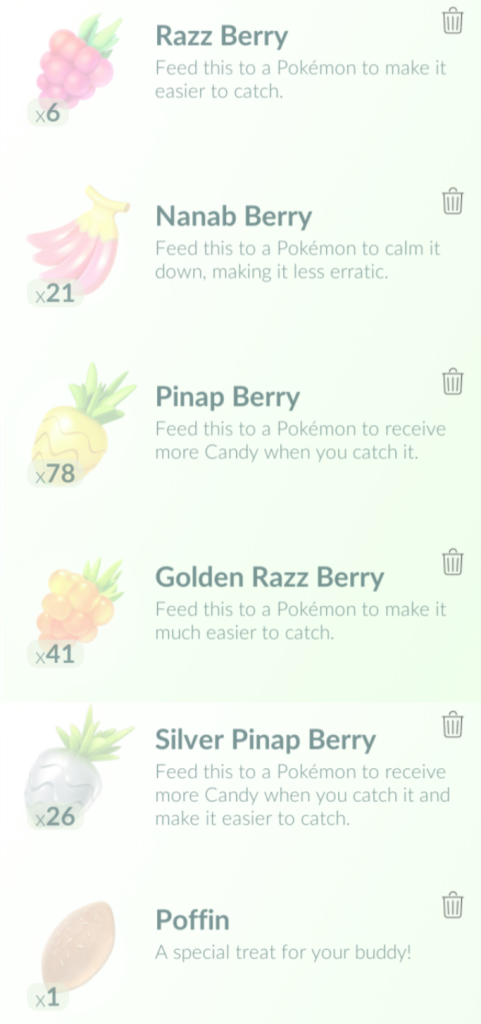
Berry
There are currently 5 different kinds of berries.
- Razz Berry: improves chance of successful capture (player level 8 needed)
- Pinap Berry: doubles the received candies on successful capture, gives more candies depending on the Pokemon stage (player level 18 needed)
- Nanab Berry: slows down the Pokemon's movement during encounter
- Golden Razz Berry: improves the chance of successful capture even more than its basic version, ideally should only be used on new Pokemon, or to fully motivate Pokemon in Gyms
- Silver Pinap Berry: improves the chance of successful capture and doubles the amount of candies
Hint: if not enough inventory space, berries can be discarded. Ideally, only discard Razz, Pinap, and Nanab berries, because they are easy to come by. Another option is to feed the berries to Pokemon in Gyms.
Research
Everyday one gets one new field research as long as not all slots are taken (4 slots plus one AR mapping one). If you visit PokeStops you can get additional field researches.
The reason why you want to do field research daily is because you need to complete 7 field researches to get a Research Breakthrough which comes with better rewards over those that you get from the field research.
Completing a field research can range from a list of activities. These task you will being tasks you will be doing anyways during your day-to-day game play, so you won't really have to >go out of your way to do them. Most of the time they deal with Pokemon encounters:
- either catching Pokemon,
- achieving certain quality of throws,
- achieving curve balls
- achieving specific throws in a row,
- using berries to help catch Pokemon,
But can also be less standard tasks like:
- winning or participating in raid battle,
- sending gifts to friends,
- trading Pokemon,
- etc.
The usual rewards for achieving a field research are either Berries or [PokeBalls][PokeBall]. There is no limit of how many field researches you can do daily. Though you can only one stamp per day towards the Research Breakthrough. This progress does not have to be done on consecutive days.
Hint: If you don't turn in your field research immediately after achieving it, you can store it and use it towards the Research Breakthrough.
PokeBall
There are 3 standard kinds of PokeBalls:
- the regular PokeBall,
- Great Ball, (unlocked at player level 12)
- Ultra Ball, (unlocked at player level 20)
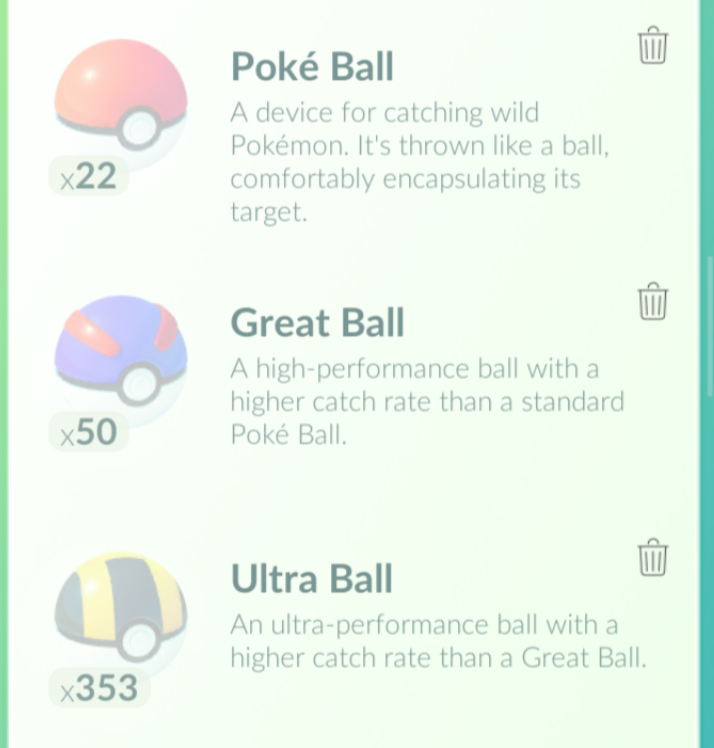
The success of capture improves the lower down on the list the ball is.
Premier Balls which are given when successfully winning a Raid or defeating Team GO Rocket (unlocked at level 5). The amount received depends on multiple factors, but if you fail to catch the Pokemon within the amount of given balls, you will lose the Pokemon.
The factors the that determine the amount of Premier Balls one gets, is based off of:
- the amount of Pokemon left after the battle,
- the [team][team-table] that did the most damage,
- the badge level in the task, and
- your friend levels, that participate in the Raid.
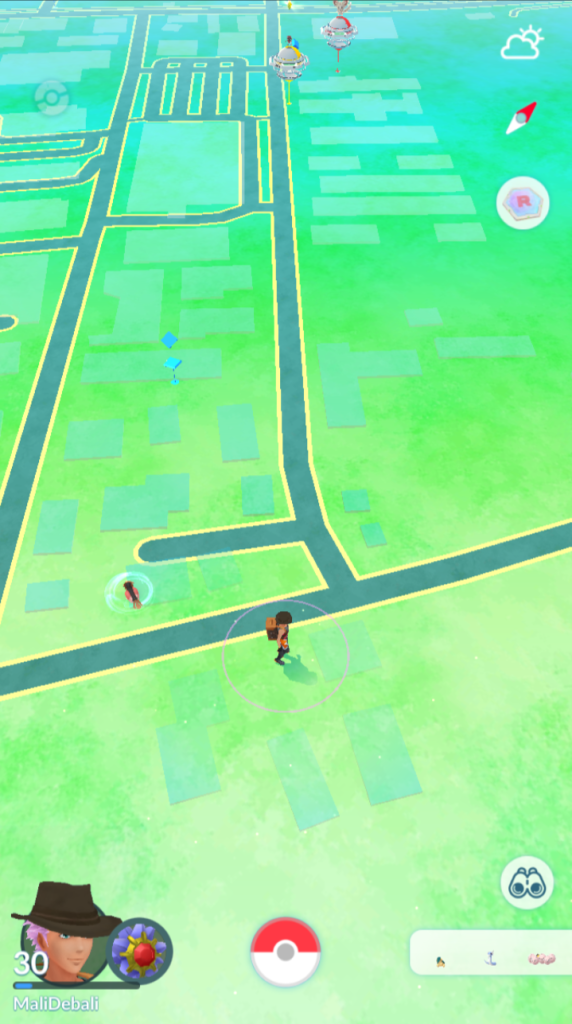
Team GO Rocket
There are two ways one can encounter Team GO Rocket, either one sees a circular shadow on one's screen and by zooming out and clicking on the hot air balloon, one can combat the Team. Or one can encounter the Team at PokeStops which is first unlocked at level 8 and are colored black (normally blue). One can spin the PokeStop without combating the Team GO Rocket member.
The hot air balloon shows up 4 times daily, once every 6 hours.
Team GO Rocket member
There are three different difficulties when encountering the Team GO Rocket:
- Grunts,
- Leaders, and
- the Boss Giovanni.
Grunt
Grunts are quite easy to defeat and give a hint of what type of Pokemon they will be using during the encounter3. Grunts do not use shields, thus you have an advantage on charge attacks. Successfully defeating a Grunt will give you a mysterious component as long as you don't already have the Rocket Radar activated. With 6 mysterious components you create the Rocket Radar, which gives you a higher chance of encountering a Leader.
Leader
There are 3 Leaders:
- Arlo,
- Cliff, and
- Sierra.
Successfully defeating the Leader the Rocket Radar will be destroyed. The Leaders are harder to combat since they use the two shields given. Thus you want to have Pokemon who have quick charge attacks, so that you can get through the shields quickly.
Boss
The Boss Giovanni is easier than the Leaders on average and can only be encountered if you have the Super Rocket Radar equipped, which is a reward of Team Go Rocket quest series.
Defeating Team Go Rocket Member
Successfully defeating any Team Go Rocket Member you have the chance to catch a shadow Pokemon by using Premier Balls. Nanab berries are quite helpful, since shadow Pokemon attack frequently, which makes them uncatchable in that phase. With some practice, one can use attack animation to ease the chance of getting an Excellent! throw.
If you have a Great Buddy, with its catch assist, if the PokeBall volleys back, your buddy will rebound it and it will be aimed at the center, thus also increasing the chance of an Excellent! throw.
Majority of the time, the shadow Pokemon you get to catch will be the first Pokemon you encounter during battle.
Participating in Team GO Rocket battles will cause damage to your Pokemon, which means you will need to use a revive on them if all the health is lost and/or give them potions to regenerate their health points.
Hint: if you are running low on revives, you can power up the Pokemon, which will increase its health points by 1 to 5 HP, and then use a potion.
Shadow Pokemon
Shadow Pokemon can be purified which will make them cost less candies to evolve and their Appraisal status will increase, usually by one star.
Occasionally, purifying these Pokemon are part of field researches. So it is always good to keep them around because they are rarer than the Pokemon that one finds out in wild.
Going Outside
Going Outside is where the game becomes healthy. By being outside, you can become more physically active and have more social interactions. These are both great for your well-being. Plus, since lots of PokeStops are in parks, you will get the benefits of nature4, which in return comes with its own set of benefits. As mentioned in the article4, just spending daily sessions of 20-30min has already positive outcomes and maximizes at 200-300min per week.
Battle League*
(*) Currently due to the Corona virus pandemnic, the Battle League can be done from the comfort of one's home.
There are different level CP leagues, which grant you different rewards depending on the amount of battles you win out of 5.
These battles are safe, meaning the Pokemon will not take damage outside of the League environment.
This is a good way to achieve more daily rewards and their is a limit of how many battles one can do daily. Plus this is also a good way to train your buddy and gather Star Dust.
Buddy5
Any Pokemon can become a buddy and you can train/swap up to 20 buddies per day. Ideally you want to train buddies that have a high Appraisal status or Pokemon that are hard to come by for candies. Since if you walk with your buddy a certain distance you get candies.
To call your buddy you need to feed it berries, usually three berries unless you use a Gold Razz Berry.
To level your buddy you need to gather hearts.
Hearts achieved at home
Typically you can achieve 5 hearts at home, (due to corona, currently even 8, because of battling):
- by giving your buddy a treat, up to three hearts, in general
- by playing with your buddy, one heart
- by battling with your buddy, up to three hearts, in general
- taking a snapshot of your buddy, one heart
If you make your buddy excited, the hearts are doubled, and the distance needed to receive a candy halved. This makes the supremum of 20 instead of 10.
At higher levels of your buddy (as of Great Buddy), you can even get bonus hearts. By having your buddy give you a gift or souvenir. Gifts are useful items like berries or [PokeBall][PokeBall]. Souvenirs have no purpose at the moment. As of Ultra Buddy, by visiting the PokeStop or Gym that the buddy wants to visit, you will get a bonus heart.
Hearts achieved outside
Beyond the home activities, there are the hearts you need to achieve outside, which are:
- one heart for every 2km up to three, unless buddy is excited
- one heart for a visiting a new PokeStop, max of one per day per buddy
Buddy levels and perks
| Buddy | Hearts needed | Perks |
|---|---|---|
| Good Buddy | 1 heart | adventuring buddy and readable mood |
| Great Buddy | 70 hearts | catch assist and finding presents |
| Ultra Buddy | 150 hearts | finding souvenirs and finding locations |
| Best Buddy | 300 hearts | CP boost when assigned (up to level 41) and best buddy ribbon |
Excluding bonus hearts, a buddy would need in ideal circumstances 15 days until it becomes a Best Buddy.
With minimum effort, such as only playing with your buddy, taking a snapshot, and feeding it once a day, it would take 100 days to achieve Best Buddy status.
PokeStop
The first spin of the day counts towards the daily streak for PokeStop spins and maximizes at 7 consecutive days, then resetting. These first spins will give you much more items over the standard of 3-5 items.
Items include:
- PokeBalls
- Pokemon Eggs
- Berries
- Potions
- Revives
- Evolution items, guaranteed on 7 days streak
- Gifts
- Stickers
At normal PokeStops, the spin cooldown is 5min. Unspinned stops are light blue and turn purple once spun.
The Team GO Rocket Stops are blackish. One can spin the stop and then encounter the Member or just encounter the Member. If spun before encounter, after defeat, the cooldown is refreshed, thus one can easily spin twice within 5min. One does not have to combat the Member and can disengage the battle, though one will have to go through the initial chat prompts.
Hint: Because Buddies need unique new PokeStops, do not initially go running around and spin each PokeStop, because you will later have to travel further and further to achieve the new PokeStop.
Hint: You can use third party tools like PogoMap6 to keep track of the places you have visited.
Gym
At level 5 you can choose your team:
| Name | Color |
|---|---|
| Valor | red |
| Mystic | blue |
| Instinct | yellow |
There are no benefits of choosing a specific team and are more for personal preferences of values, beliefs, and goals.
Above that, you need to join a Team to participate in Gym and Raid battles. Both of these battles happen at Gyms.
A Gym is like a PokeStop as that you can receive the items by spinning at them. Though you do have a higher chance of receiving potions and revives, in comparison.
If your Team owns the Gym, then you get Team bonus, which means even more items. Thus, depending on how many Pokemons are defending the foe Gym, it might make sense to wait and first spin after defeating the Gym, because you will have access to those extra items. Though if the foe Gym is fully occupied by 6 Pokemon, or health point heavy Pokemon, then it makes more sense to spin before hand and again afterwards. Because remember that the cooldown of a spin is 5min.
Gym Badges
When you initially spin at a Gym you will get a Basic Badge. Beyond that you need the following Points:
| Badge | Points |
|---|---|
| Bronze | 500 |
| Silver | 4,000 |
| Gold | 30,000 |
Other than just having a memento, the badges do have a purpose, in such that you receive more items when spinning at the Gym.
Getting Points in Gyms
There are five ways of getting Points in Gyms:
| Activity | Points |
|---|---|
| placing a Pokemon in a Gym | 100 Points |
| defeating Pokemon in Gym | 1 Point per 100 CP of defending Pokemon (rounded down) |
| feeding berry to Pokemon in Gym | 10 Points, though one can only feed 10 berries per half an hour per Pokemon |
| defending a Gym per minute | 1 Point |
| winning a raid at the Gym | 1000 Points |
Thus the best ways to get the Points needed for a Gold Badge is to:
It will take either winning 30 raids or defending a Gym for 20 days to achieve the Gold Badge.
Hint<#poke-coin-in-gym>: for every 10min you defend a Gym is equivalent to 1 PokeCoin, which is first received once your Pokemon is defeated and returns back home. Plus you can only have 20 Pokemon defending Gyms at any time.
Raid
Raids happen in Gyms. You can do raids:
- alone,
- publicly in a group, or
- privately with your friends.
If you/group is successful, you have the ability to catch the Pokemon you were combating. These Pokemons are usually at least 3 starred. Thus it is highly recommended to catch them.
Choosing a Pokemon for Defense
In general there are two main tactics, either putting a CP heavy Pokemon or a HP Pokemon. Because this will make the attacker spend more time in combat and if the attacker fails to defeat the Pokemon within the time limit, then they have to try again. Plus it will cost more potions or revives to heal up the attacking Pokemons. Also this will give you enough time to heal up the defending Pokemons, ideally with Golden Razz berries.
A less known option is to put a low CP Pokemon. This will definitely save you the cost of potions plus you won’t likely be using a revive on such Pokemons. One should ideally keep potions and revives for heavy CP/HP Pokemon.
In the long run it makes little difference which Pokemon one chooses.
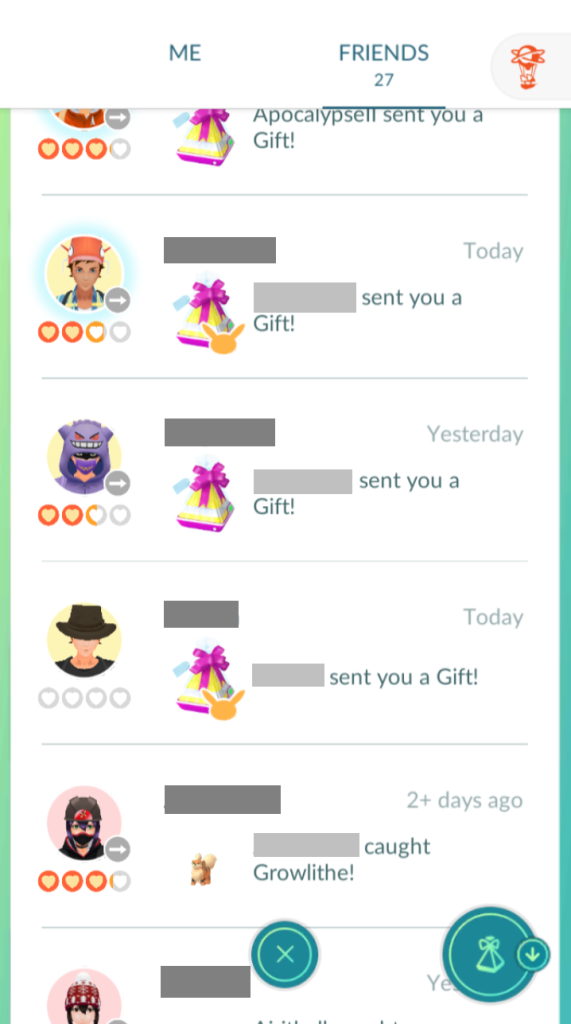
Friend
There are lots of benefits of having friends, the active one is getting gifts, which include a range of items like by PokeStops, or passive ones:
- trade discount using star dust*,
- attack damage in raid battles,
- extra raid balls aka Premier Balls,
- bonus XP
You can have up to 200 friends. You can invite your friends to help you in Raid battles. Only if you do a raid with friends will you get the benefits of attack damage and extra raid balls.
(*) star dust is needed to power up Pokemon or learning a new attack.
Friendship levels
| Level | Interactions | XP | Trade Discount | Attack Damage | Raid Balls |
|---|---|---|---|---|---|
| Good Friend | 1 | 3,000 | 0% | 3% | +0 |
| Great Friend | 7 | 10,000 | 20% | 5% | +1 |
| Ultra Friend | 30 | 50,000 | 92% | 7% | +2 |
| Best Friend | 90 | 100,000 | 96% | 10% | +4 |
Interactions are either sending/receiving gifts or participating in raid battle with friends.
Gift
One can hold up to 10 gifts in your inventory and open 20 gifts daily. (* Due to COVID-19 the amount has been extended to opening 30 gifts per day and storing 20 gifts).
You can only send one gift to one friend per day. You receive 200 XP for every gift that you send.
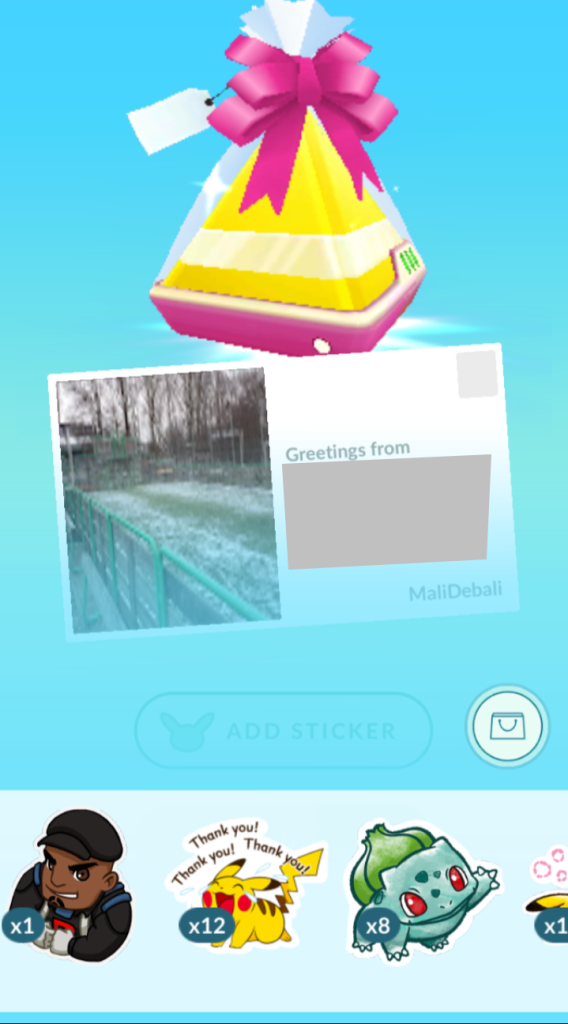
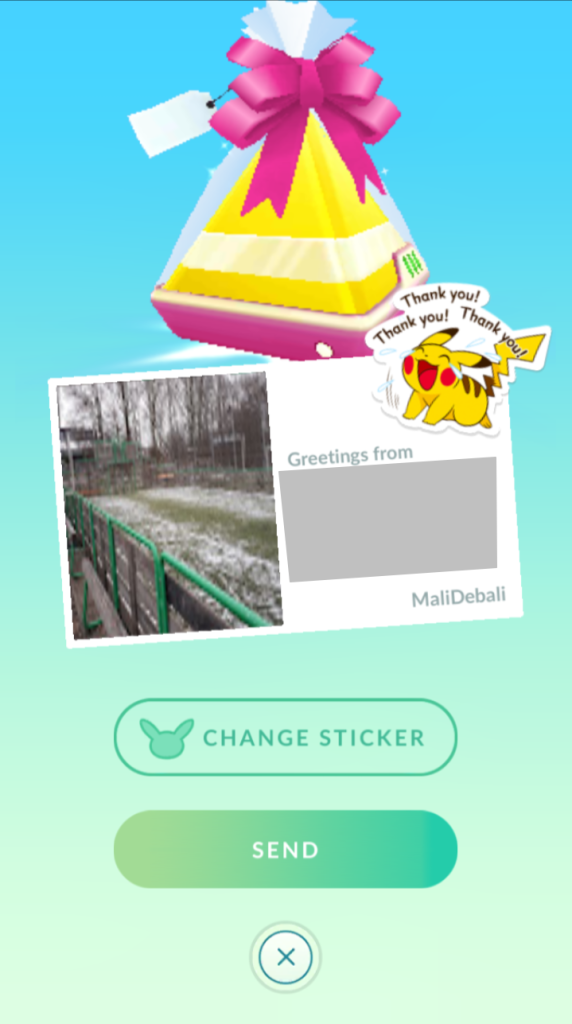
When you receive a gift, it comes in format of a postcard.
You can choose to add a sticker to the gift that you send. This is just extra decoration and there is no further benefit.
You can hold up to 25 units of a unique sticker.
How to get Friends
There are three main ways of getting friends.
- Asking you already current friends if they play Pokemon GO.
- Finding other players in the wild and asking them if they want to be friends.
- Joining online forums or Discord servers7 8. This is the best option to grow your friend list fast.
Pokemon Eggs
Pokemon Eggs are an additional source of getting Pokemons. To hatch them, you need to walk a specific distance. There are 5 different kinds of eggs, where 3 kinds can be received by PokeStop or Gym spins. The eggs are:
| Kind of Egg | Obtain Location | XP | Stardust | Candies |
|---|---|---|---|---|
| 2-km Egg | PokeStop/Gym | 200 | 400-800 | 5-15 |
| 5-km Egg | PokeStop/Gym | 500 | 800-1600 | 10-21 |
| 7-km Egg | Gifts | 500 | 800-1600 | 10-21 |
| 10-km Egg | PokeStop/Gym | 1000 | 1600-3200 | 16-32 |
| 12-km Egg | defeating Team GO Rocket Leaders | - | - | - |
Additionally to the newly hatched Pokemon, you will get XP, Star Dust, and Candies.
You can hold up to 9 unhatched eggs at any time.
To hatch an egg you need to put it in an incubator. There are three incubator varieties:
| Incubator | Usage Amount |
|---|---|
| Egg Incubator ∞ | ∞ |
| Egg Incubator | 3 uses |
| Super Incubator* | 3 uses |
(*) distance is a third shorter

Hint: don't use any other Egg Incubator for the 2-km Eggs, except the Egg Incubator ∞. Since the Egg/Super Incubator need to be bought with PokeCoins or rewarded from Special Research.
Hint: if a special event is happening and the distance needed to hatch an egg is reduced, then limit the Egg/Super Incubator for only eggs that still need at least 3 km.
Beyond the Activities within the Game
Community Projects
You can participate in the open community project PogoMap6, which is documenting all kind of data points within the game, like PokeStops, Gyms, spawns, etc. It is free to join the project and they even have a Discord Server7.
Physical Activity
Since a large portion of the game is spent outside, you could use PokeStops or Gyms as random activity generators. For example:
- if you defeat a foe Gym the rep count decreases by one, or
- depending on which Team Gym you come by a different exercise is performed, or
- depending on the amount of Pokemons in the Gym various exercises or reps are performed,
- etc.
Thus you can get even more exercise in.
Workout Setup
All workouts assume that you have a ruck with you. A ruck is recommended in general, because as the loops extend in distance, you will need to tend to your needs.
Recommended gear9:
- hydration source, e.g. CamelBak
- food, e.g. nuts and dried fruit
- power bank
- head lamp with backup batteries
- gloves, in cooler seasons, ideally ones that you don't have to take off to use
- rain coat
Loop
A loop is considered as the route you choose to follow to get the most Gyms in without doing a segment twice.
Workout Models
There are many possibilities for models and is heavily dependent on how random you want it to be and how much focus you want to put into it.
Basically anything can be a factor:
- the color of the Gyms,
- the items received when spinning Gyms/PokeStops,
- the Pokemon you have to battle,
- the Pokemon that are defending,
- the type of Pokemon, the CP of the Pokemon,
- the amount of Pokemon in the Gym,
- etc.
Only your imagination will create the limit of factors.
The Slide (Simple)
- Let us assume your loop has 10 Gyms. This will be the initial reps count.
- Choose the exercises you want to perform, e.g. ruck curls, push-ups, ruck thrusters.
- At each Gym:
- If the Gym is belongs to a foe Team, then decrease the reps by one.
- Else don't change the reps.
- Complete the loop and see how many reps you have left.
Optional:
- change when a range is decrease your Team vs for Team
- do a Ladder instead of a Slide and increase the reps for specific Teams
- use an arbitrary amount of initial reps independent of the amount of Gyms within the loop
Team Roulette (Moderate)
- each Team has specific exercises, like Yellow: ruck thrusters; Red: push-ups; Blue: ruck curls
- each time you battle a Pokemon is considered one rep, thus max is 18 and min 1
- if your Team owns the Gym, then the reps are 3 times the amount of Pokemon defending it
Do the loop while following the conditions above.
Spin Roulette (Complex)
- Each item you receive from spinning at a Gym is an exercise.
- The reps can either be determined by
- the amount of items you receive, or
- the amount of Pokemon in the Gym multiplied by the amount of same items. For example if there are 4 Pokemon and you received 2 revives, then you do 8 reps of whatever you assigned revives to be.
Hint: You don't have to count the items directly after spinning and can use your journal, which keeps track of all your actions.
Optional: If that is too complex, you could instead split up the spin into three sections:
- amount of basic items you received,
- amount of items you received from Team bonus, and
- amount of items you received from Gym Badge bonus.
Thus you will only have to choose three exercises, instead of, at least 10 exercises.
How I play the Game
First I make sure that I get my daily streaks in. I have the luck that I live close to a PokeStop, and if the weather is bad, the GPS sometimes puts me right beside it. So I don't even have to leave the house.
Though I do leave the house multiple times per week. I leave the house when ever I run out of gifts to send to my friends, which usually happens every third day. (Pro Tip: the more friends you have, you more times per week you will have leave the house.)
I started by planning a route that includes as many Gyms as possible, because I like to combine them with additional physical activities plus I bring my ruck along. I started off with a 2 km, then extended it to 5.5 km, then 9.5 km, and now 11 km loop. Thus on average I achieve 30-50 km per week.
Before I start my loop, I choose the Buddy that I want to train that day. And I focus mainly on the Gyms, because otherwise I will be spending way too much time on each PokeStop and catching each Pokemon on the way.
Every once in awhile, I choose to document new PokeStops and Gyms in my area into PogoMap6. Thus I learn more of the town that I live in and also helps out the community. Additionally this expands my loop distance.
If I come up to a Gym of my Team, then I place a heavy HP Pokemon if there is still space left. Otherwise if it is a foe Team Gym, I choose a recently caught Pokemon that I have favored.
Favoring Pokemon prohibits you in accidentally transferring the Pokemon. Thus when I get the Appraisal status and my minimum limit has been reached, I favor it. This saves me in the long run with potions and revives.
If I don't do the additional physical activities, then I do a workout on the home stretch, the last 2 km. Sometimes I combine the ruck with shopping, since it is on the way home. Or carry a sandbag for those last 2 km or in reversal order the first 2km.
On average I spend at least 2 hours outside and with these longer distances now, it easily extends to 5 hours. Thus I easily get my weekly dose of nature4.
Hint: Since lots of Gyms are close to parks with sand:
- one could carry a sandbag between two locations,
- empty it out, and no sandbag until the next park,
- then refill the sandbag, and start the whole process again.