How to make a before and after GIF for OpenStreetMap
Setup
Easy
The easiest way to get the images is just by taking a screenshot of the screen.
Basic steps:
- Take a screenshot before you start editing
- Take a screenshot after the render went through
- Repeat step 2 until you have finished editing
Tip
Save the URL of the view. Click on it before taking your before screenshot. There is a chance that the saved and current URL do not align in what they render.
Medium
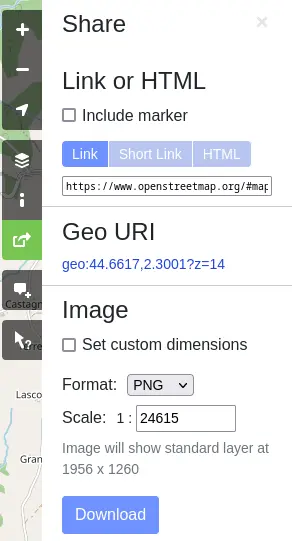
- Navigate to the OpenStreetMap1 domain and click on the Share button on the right.
- Download the image or choose
Set custom dimensions, which will allow you to save a cropped version of the image.
Pros
- Can download multiple different format types. Especially SVG is handy if you want to make a GIF using Natron2
Cons
- It is a couple of extra clicks where a screenshot can create similar results quicker.
- If you use Set custom dimensions and move the crop window, there is no way to guarantee in getting the same crop window next time you load the page. This means more editing needed in later steps.
Advanced
This method works even if you forgot to take a screenshot before starting. Though there is much more setup needed before starting.
- Install OpenStreetMap Carto
- Clone the Git Repo: Mapping before & after and follow the instructions of usage
Sources
Basic instructions in capturing the images.
OpenStreetMap1
- Navigate to the location
- Take a screenshot (before)
- Make changes and upload/save them
- Clear cache and refresh page (Ctrl+F5)
- Take a screenshot (after)
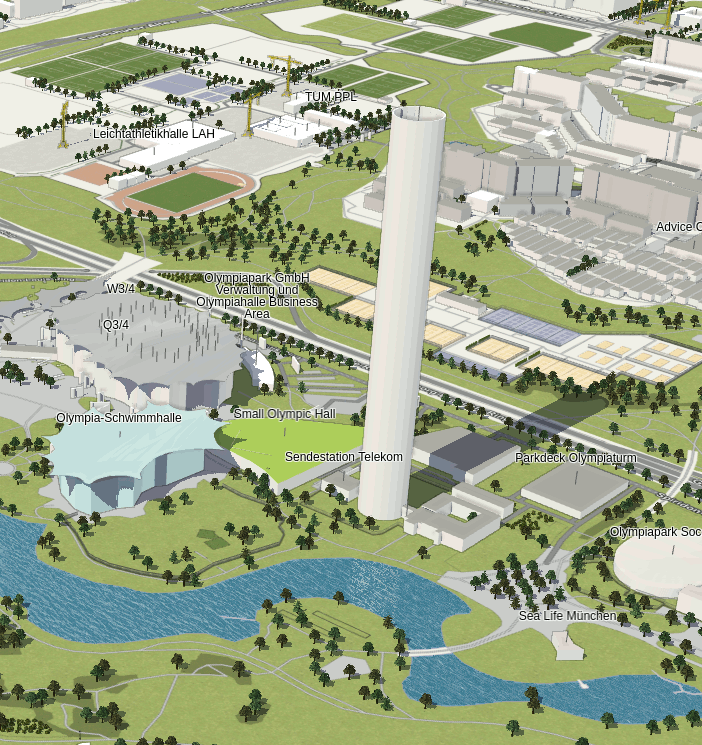
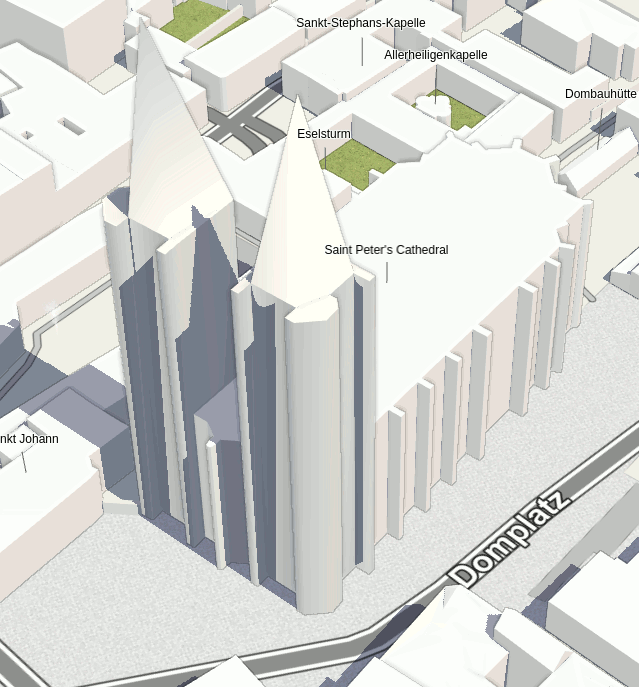
F4map3
- Navigate to location
- Adjust the camera and view to your liking
- Save the URL (*)
- Click on the URL
- Set Time to a constant like Noon by clicking on the
hamburger icon > Graphic options > Time > Noon. By default the time is set to Live. - Take a screenshot (before)
- Make changes and upload/save them
- Wait until the render goes through (**)
- Click on the saved URL
- Set Time to a constant like Noon by clicking on the
hamburger icon > Graphic options > Time > Noon. By default the time is set to Live. - Take a screenshot (after)
(*) Saving the URL will guarantee that you get the exact same view every single time. This is very important in 3D because one degree offset can make it very hard to fix it afterwards
(**) The speed of rendering depends on multiple factors, though large cities render quicker than smaller ones. For large cities one can expect once per day where other locations is a couple times per week. If you are looking for quick renders, you can try OSMgo4.
Making GIFs
There are multiple ways from offline to online options: