How to quick map with OsmAnd

This tutorial will teach you how to make quick action presets and how to organize your screen for most efficient mapping experience.
This tutorial is based off of OsmAnd~ version 4.2.6. You can get a free copy of the pro version via F-Droid1. (The OSM Live feature2 can be acquired for free if you are an open street map contributor.)
Quick actions
In this section we will look at how to setup quick actions and which ones are recommended.
How to activate quick actions
- First open the hamburger menu.
- Then navigate to Configure Screen.
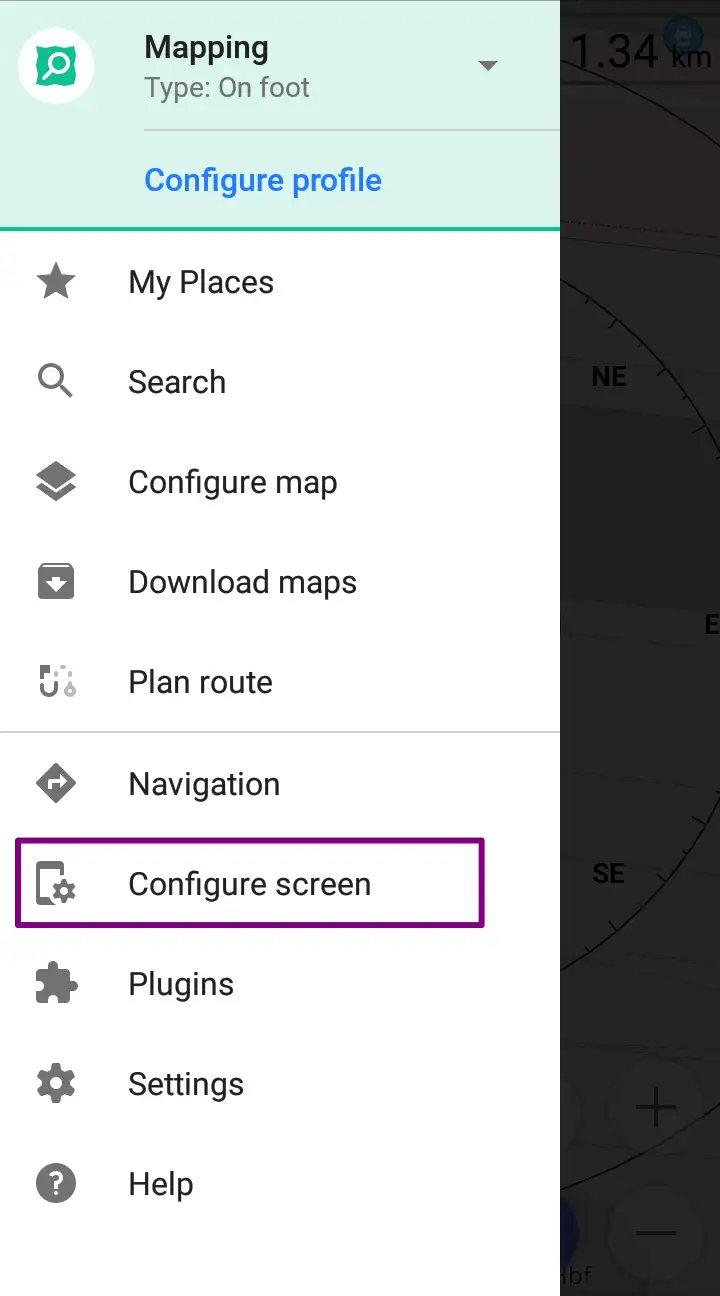
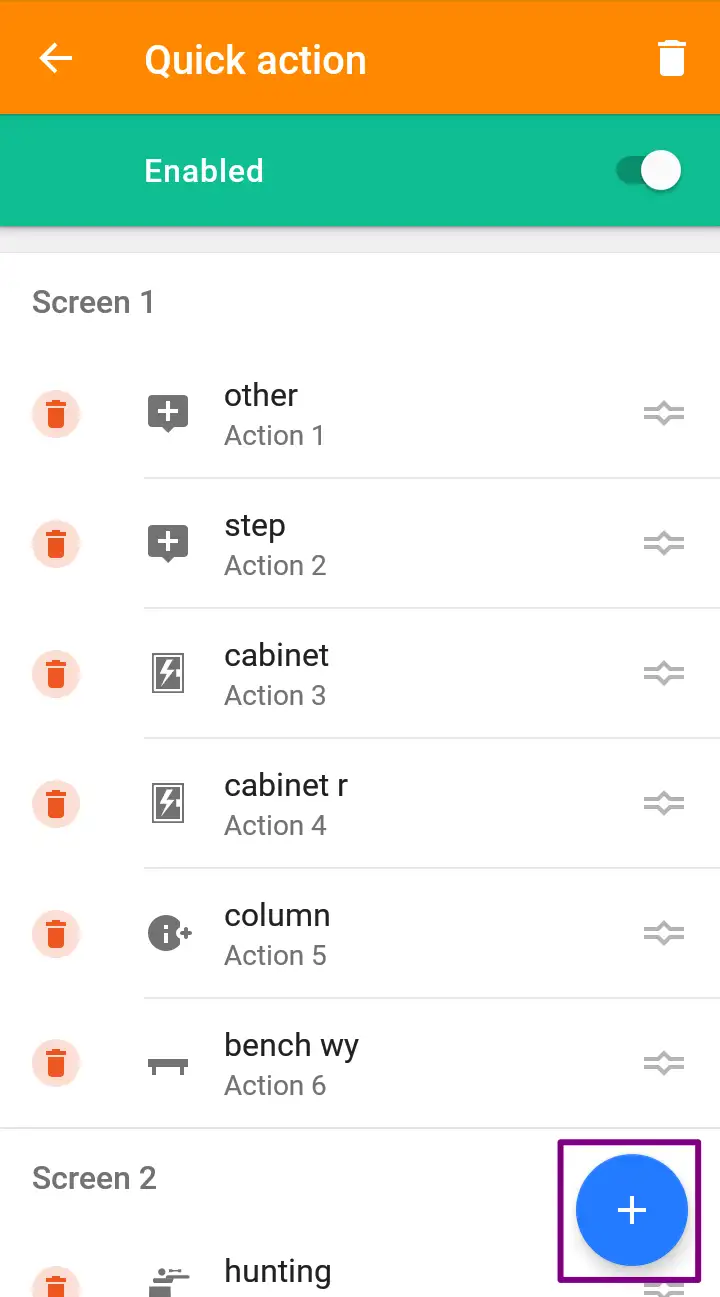
- In this panel you want to scroll down until you get to the Buttons section. Here click on Quick action.
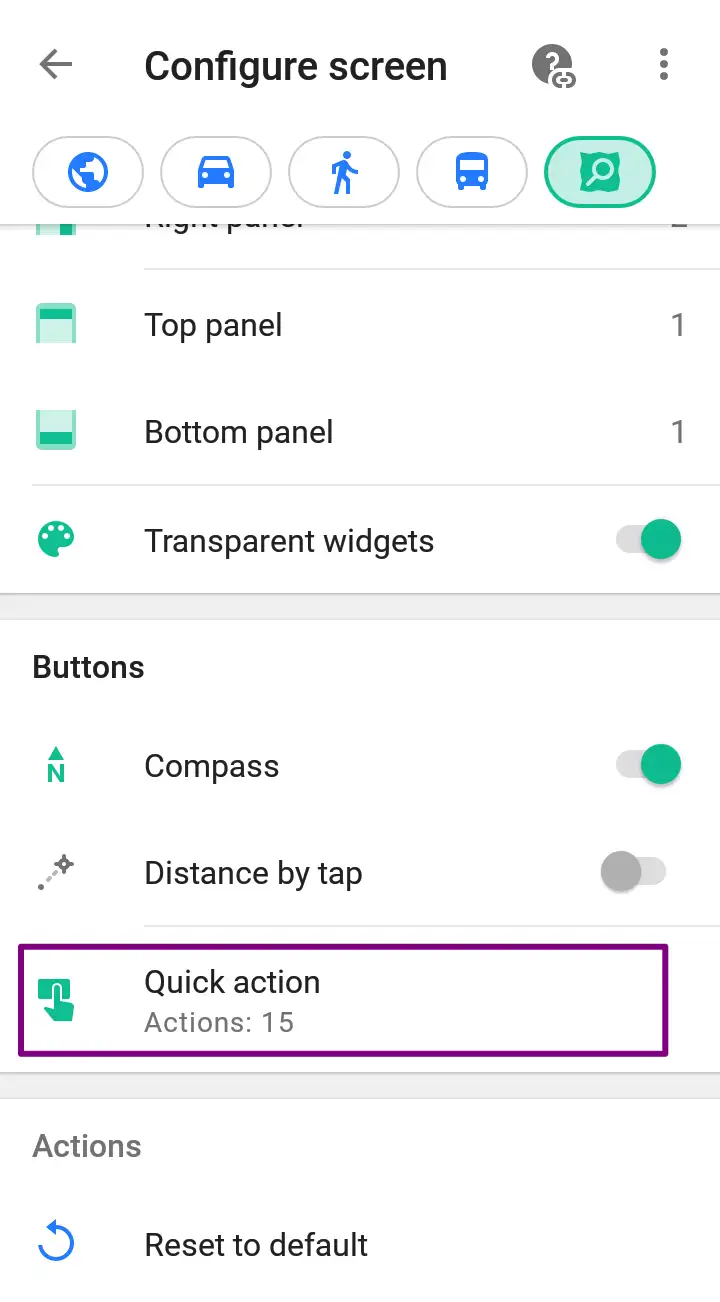
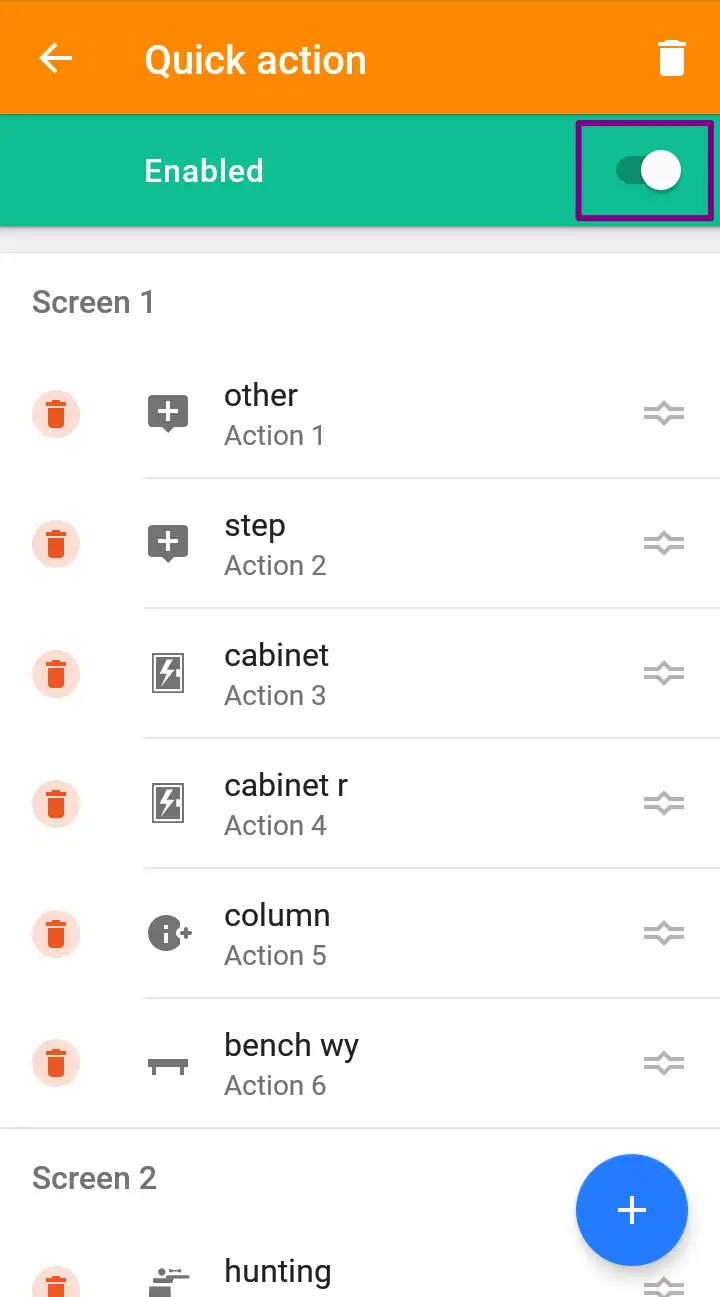
- Next you want to enable it by clicking on the Enabled switch.
- If all done correctly there should be a new button on the default screen.
How to create your own quick action, example: Add POI
- In the Quick action panel click on the
+floating button.
- Here choose the quick action you want to make. We will be creating a POI by clicking on Add POI.
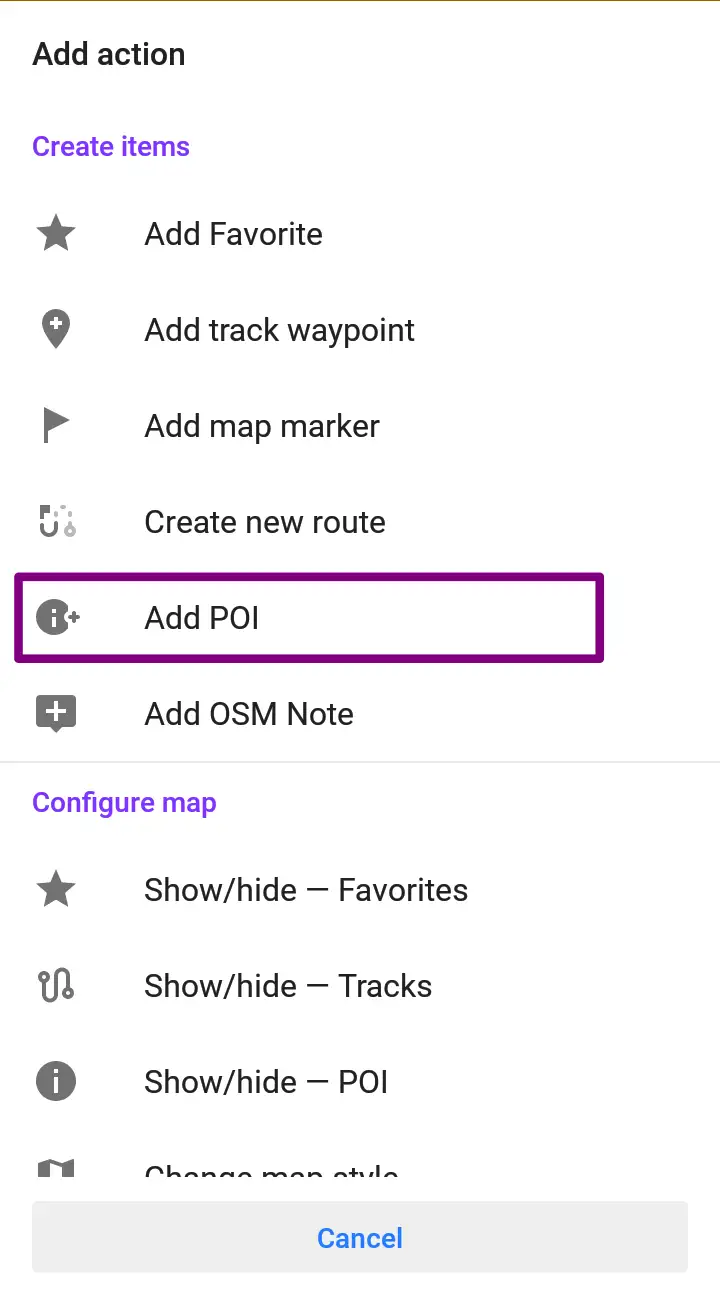
- OsmAnd comes with a wide range of templates by typing them in the POI type drop-down. We will be creating a hydrant.
- Next you want to add a short name to distinct your quick actions in the Action name. We chose
hydrant usfor hydrants that are underground and positioned on the sidewalk.
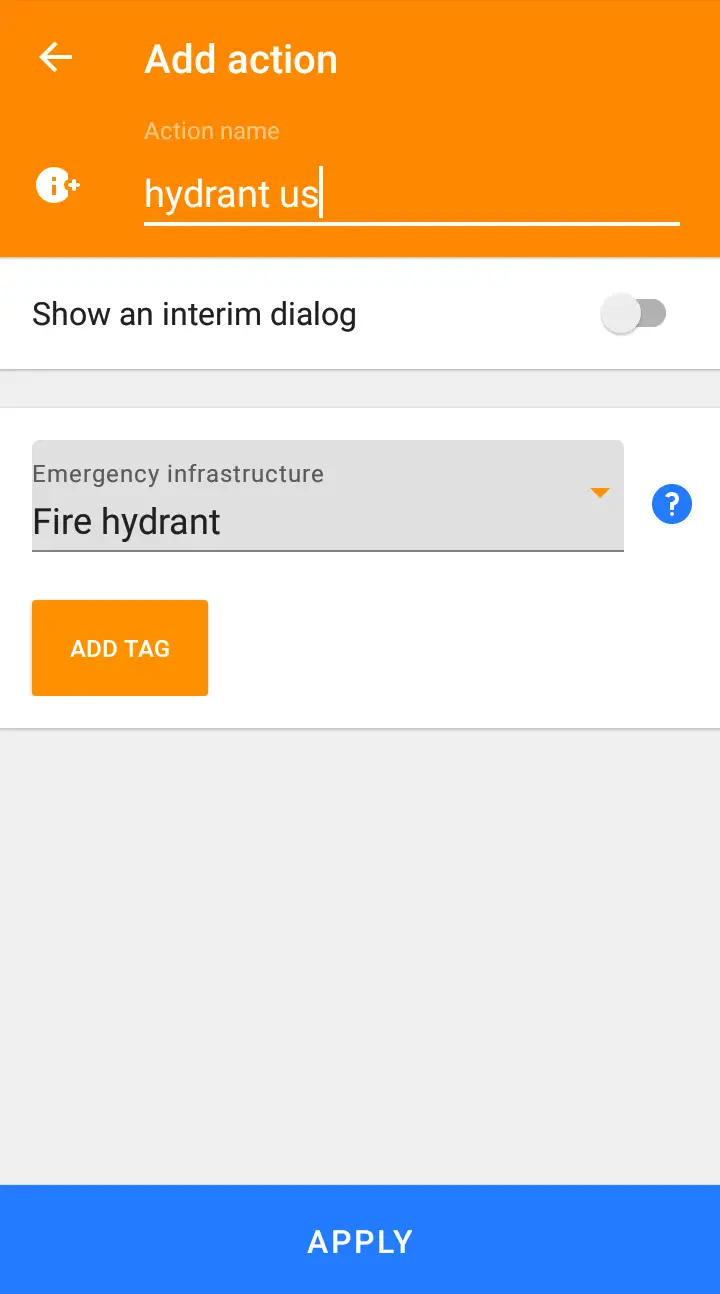
- Now you want to add any additional tags.
The template adds the parent tag, so in our example there is no need to addemergency=fire_hydrant.
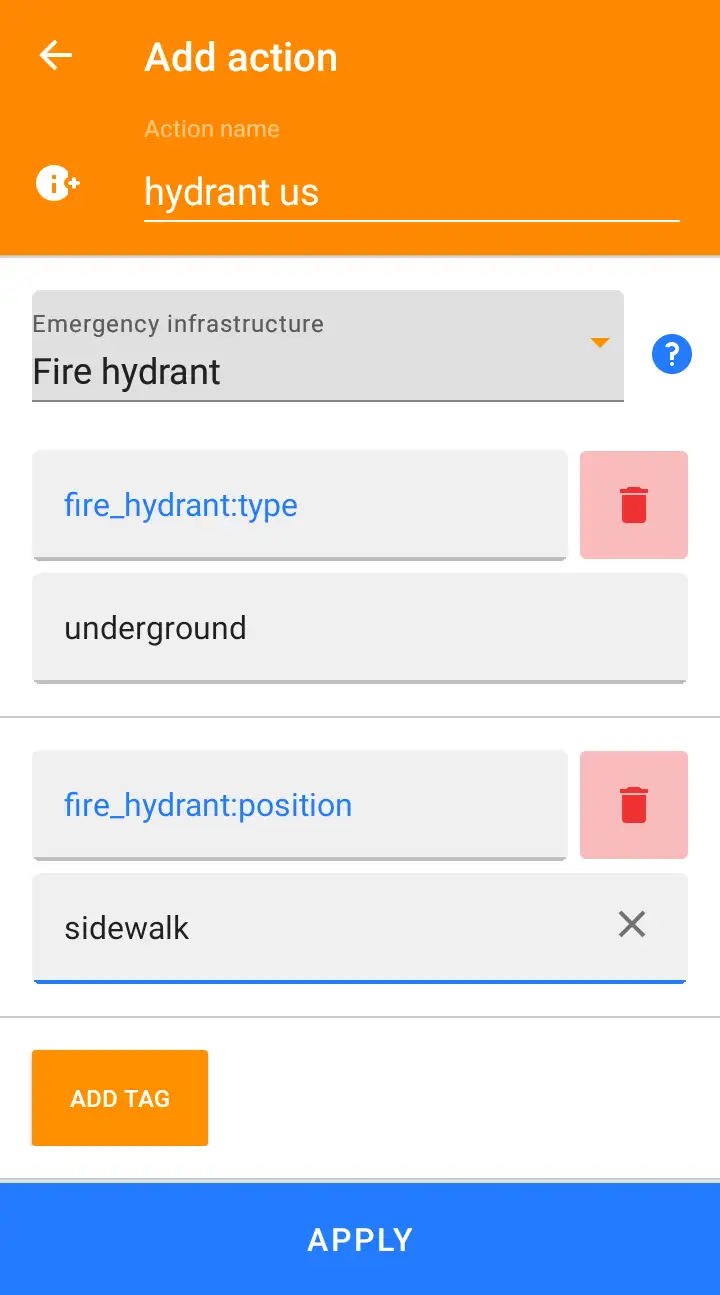
- Once done don't forget to click the Apply button.
What quick actions to create
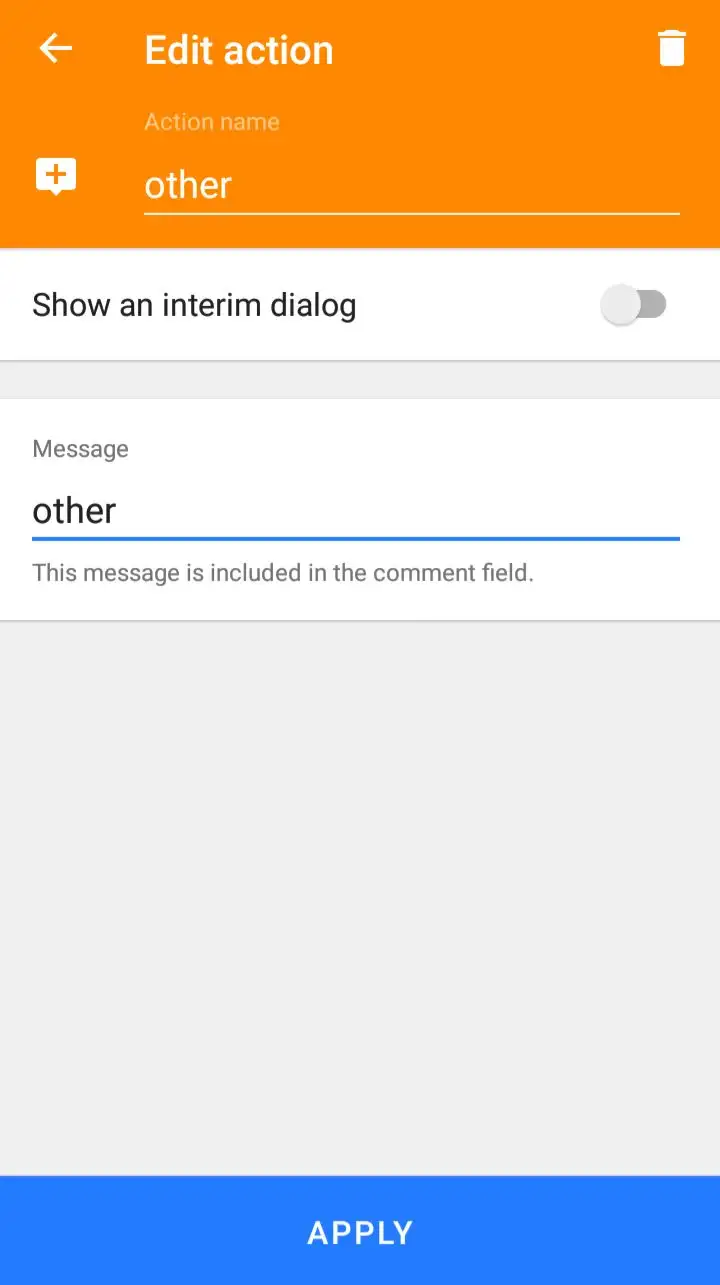
The quick actions you choose to setup all depends on what kind of mapper you are. The minimum one recommended is an OSM note one.
The one made here is called other and for the Message other_ is used (the underline is to depict a space character). It is highly recommended to have a trailing white space, because you will usually add more details to the message and don't want to constantly add that space character.
If you like this profile, you may import3 it and there are more suggestions to import4 as well.
Ideas
| Urban | Rural | Natural: trees |
|---|---|---|
| vending machines like cigarette or newspapers | benches | beech |
| waste baskets | waste baskets | birch |
| dog stations | dog stations | cedar |
| grit bins | poles | chestnut |
| street cabinets | wayside crosses | hazel |
| advertising | linden | |
| benches | maple | |
| hydrants | oak | |
| willow | ||
| yew |
Scheme for trees
Best to use this scheme for trees with example birch and location in Germany:
1denotation = urban
2genus = Betula
3genus:de = Birke
4genus:en = birch
5genus:wikidata = Q25243
6leaf_cycle = deciduous
7leaf_type = broadleaved
8natural = tree
Would recommend to refrain from adding species details unless you are a botanist. Here is the additional details that can be added
1species = Betula pendula
2species:de = Hänge-Birke
3species:en = Silver birch
4species:wikidata = Q156895
The language keys are technically redundant as long as the wikidata key is added, since those details come from that reference.
Adjust the language keys as needed for you location. It is recommended always to add en if you choose to add that detail. Otherwise Osmose5 will throw a warning.
Configure screen
In this section we will look at how to modify the screen so that one can map quickly without add any unnecessary actions.
How to move buttons
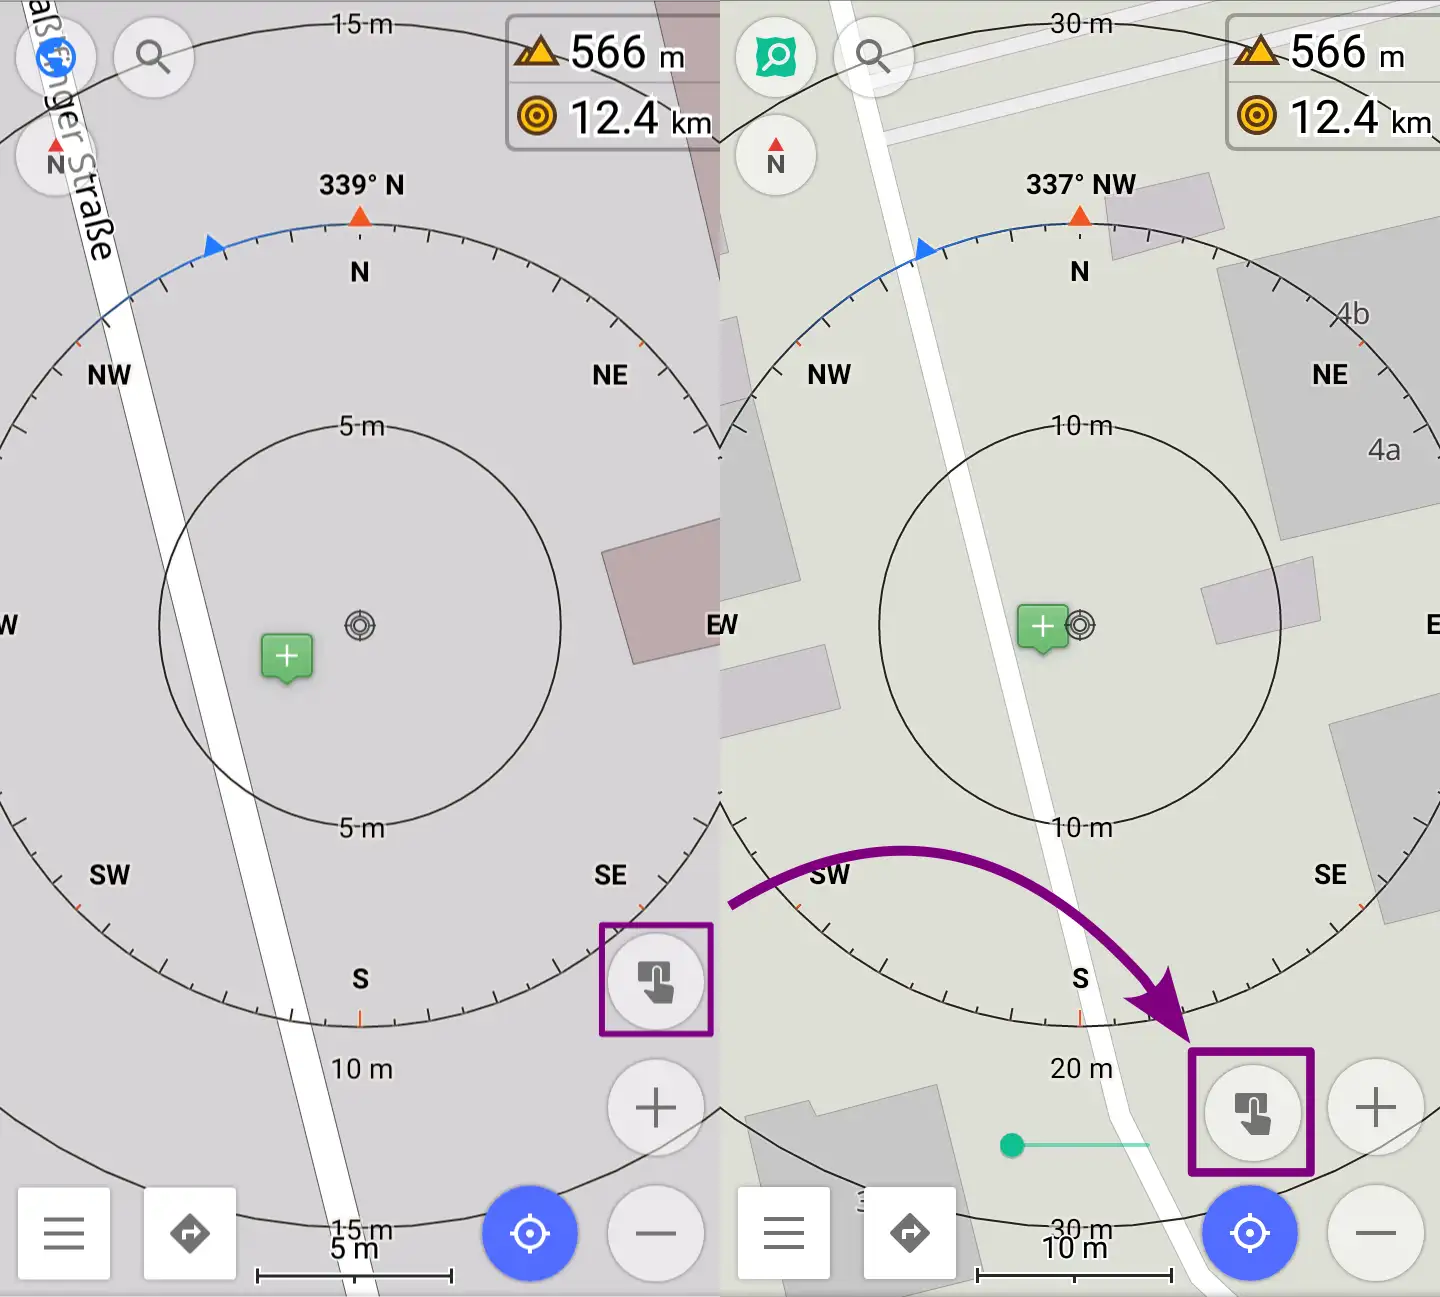
If not familiar any floating button on the default screen can be moved if you long hold it and then drag to the new position.
Which features should be activated
| Feature | How to activate | Description |
|---|---|---|
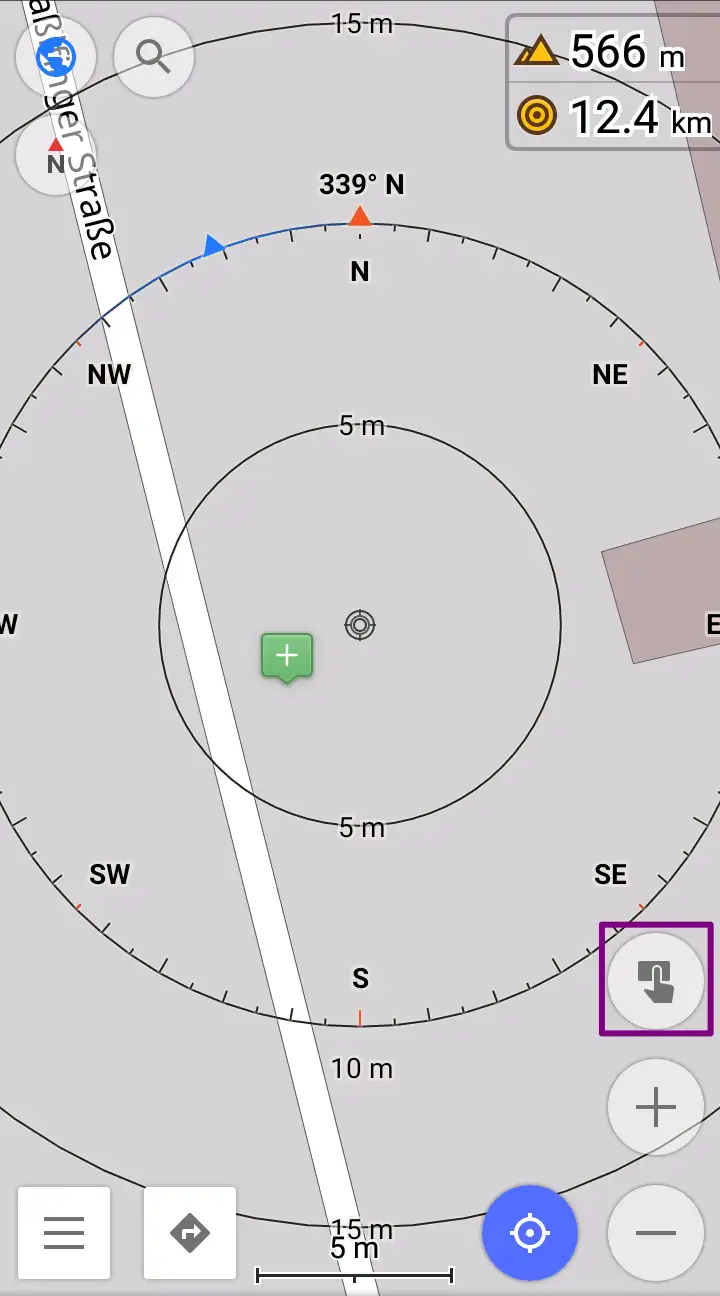
| Radius ruler | Configure screen > Widgets > Right panel > Radius ruler | This helps with figuring out the distance between you and the location. |
| Overlay map:OsmAnd(online tiles) | Configure profile > Configure Map > Show > Overlay map > OsmAnd (online tiles) | This helps in the case that the downloaded map doesn't render certain amenities like advertising=column, though the online version does. |
| OSM notes (online) | Configure profile > Configure Map > OpenStreetMap > OSM notes (online) | Activate only when online |
| OSM edits | Configure profile > Configure Map > OpenStreetMap > OSM edits | This allows you to directly edit the map. |
| Details:More details | Configure profile > Configure Map > Map rendering > Details > More details | This adds additional details. |
| Details:Color-code buildings by type | Configure profile > Configure Map > Map rendering > Details > Color-code buildings by type | This helps to distinguish the building variety. |
| Details:OSM mapper assistant | Configure profile > Configure Map > Map rendering > Details > OSM mapper assistant | This aids in mapping. |
| Hide:underground objects | Configure profile > Configure Map > Map rendering > Hide > underground objects | This hides underground objects. |
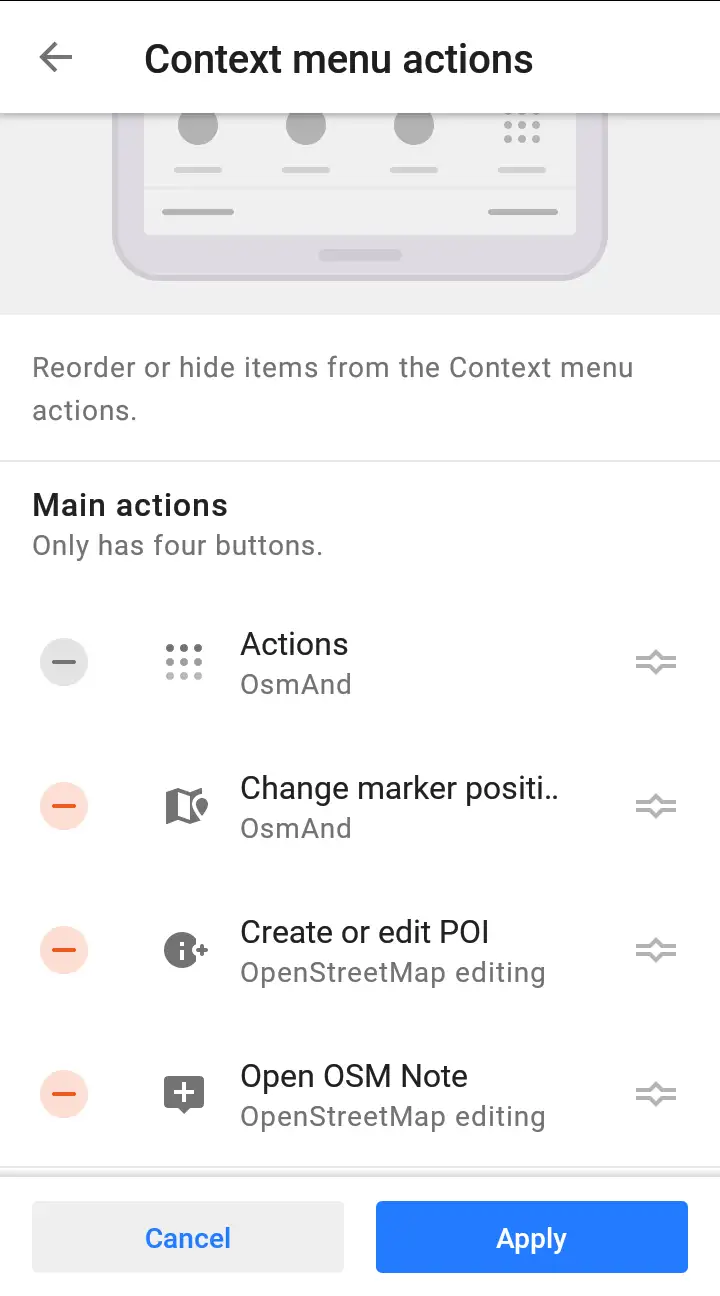
| Actions | Configure profile > UI Customization > Context menu actions > Main actions | These are actions that are available when you select an object or POI. |
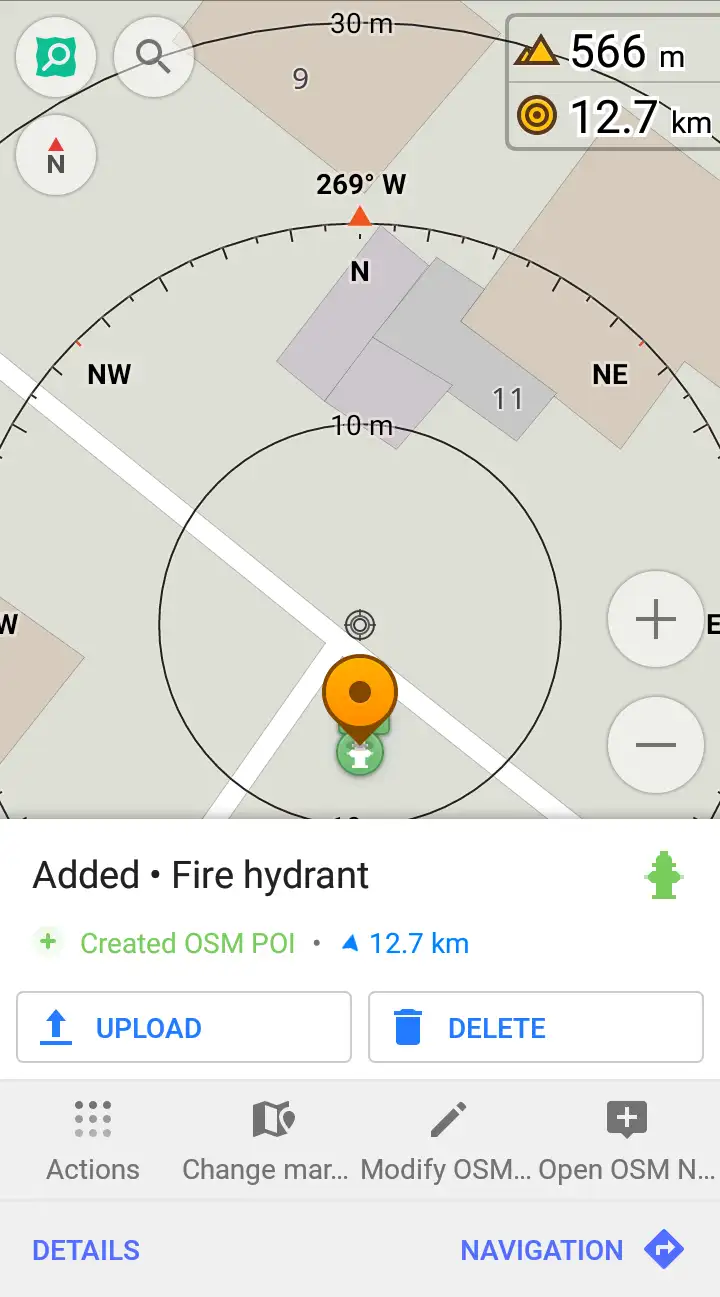
How to setup context menu actions
It is recommended to sort the actions as such:
- Actions
- Change marker position
- Create or edit POI
- Open OSM Note
This order is setup in such a fashion that the most used action is closest to dominant finger/thumb. So in this case it would be the right thumb.
The result should look like this