How to Fast Draw with a drawing pad in JOSM
This guide assumes that one has already installed JOSM and the FastDraw plugin. Also a drawing pad/drawing tablet (pad) is required, this guide uses ugee S640 (no affiliation).
An ugee drawing tablet was chosen since it is compatible with Linux. Make sure to install the latest drivers(S640) for the drawing tablet. This installs the application where various settings can be adjusted, including the shortcut keys and the two pen buttons.
The ugee application setup
Make sure to connect the tablet before proceeding with the setup.
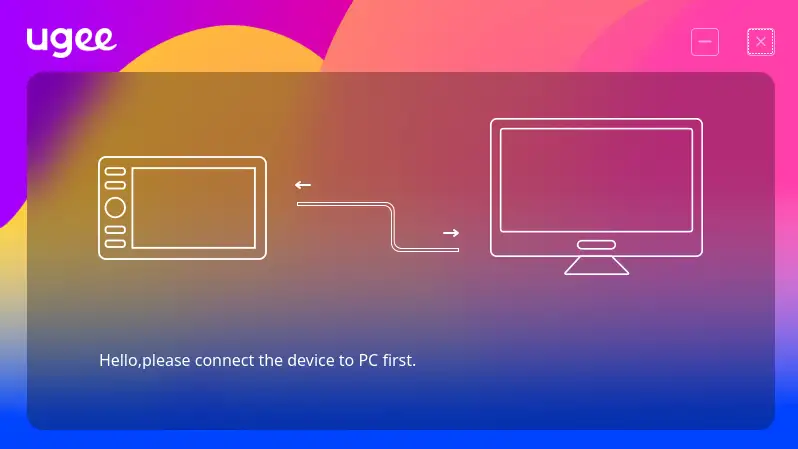
If this image still pops up, although the device is connected, usually pressing one of the keys will register the connection.
The work area setup
It is recommended to align the work area to only one monitor (if more exist), so that the reference between the pad and screen is easier to comprehend.
The pen setup
The pen has two buttons, the bottom button is smaller, and the top button is larger.
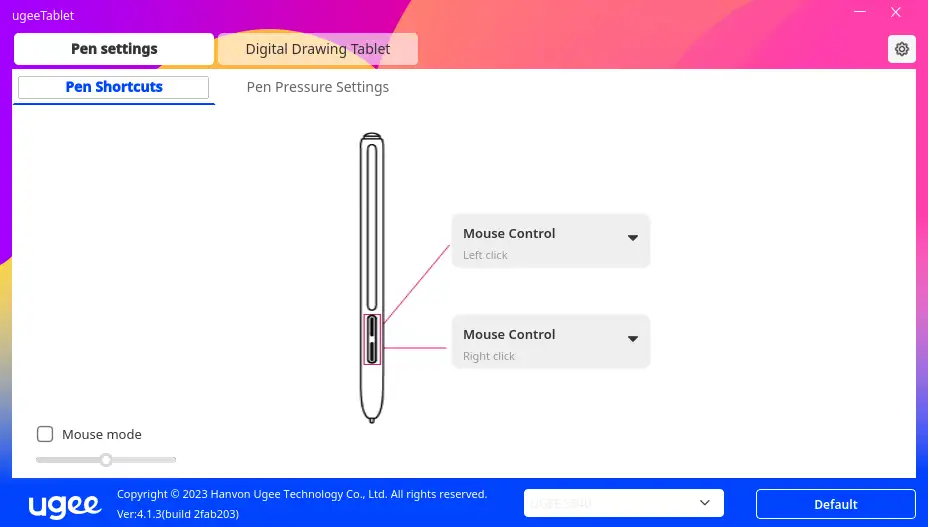
- Top: left mouse click - to ease the clicking over clicking via putting pressure onto the pad.
- Bottom: right mouse click - to ease the moving of the editors cross section or map.
The shortcut keys setup
The drawing pad comes with 10 keys (K1-K10) that can be assigned.
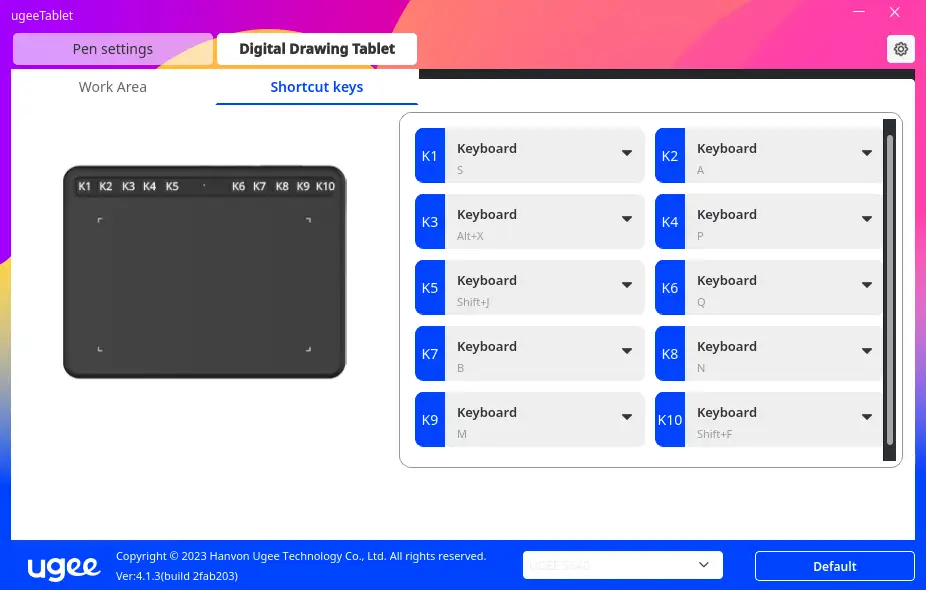
- K1:
S- to select an entity - K2:
A- to add a new node - K3:
Alt+X- to split an area (utilsplugin2) - K4:
P- to split a way - K5:
Shift+J- to join overlapping areas - K6:
Q- to orthogonalize a shape - K7:
B- to draw a orthogonalized building (BuildingTools) - K8:
N- to connect a node to the nearest way - K9:
M- to merge nodes into one - K10:
Shift+F- to fast draw (FastDraw)
If one is drawing a lot of buildings the X shortcut to extrude an area is quite helpful and is a good alternative to K3 or K4.
Although the shortcut key setup permits multiple actions per key, it is advised to avoid this to void any unintended actions.
The ugee tablet setup
One thing we are missing from the tablet is a way to identify the various keys, thus we used a sticky note to make a simple legend for each key.
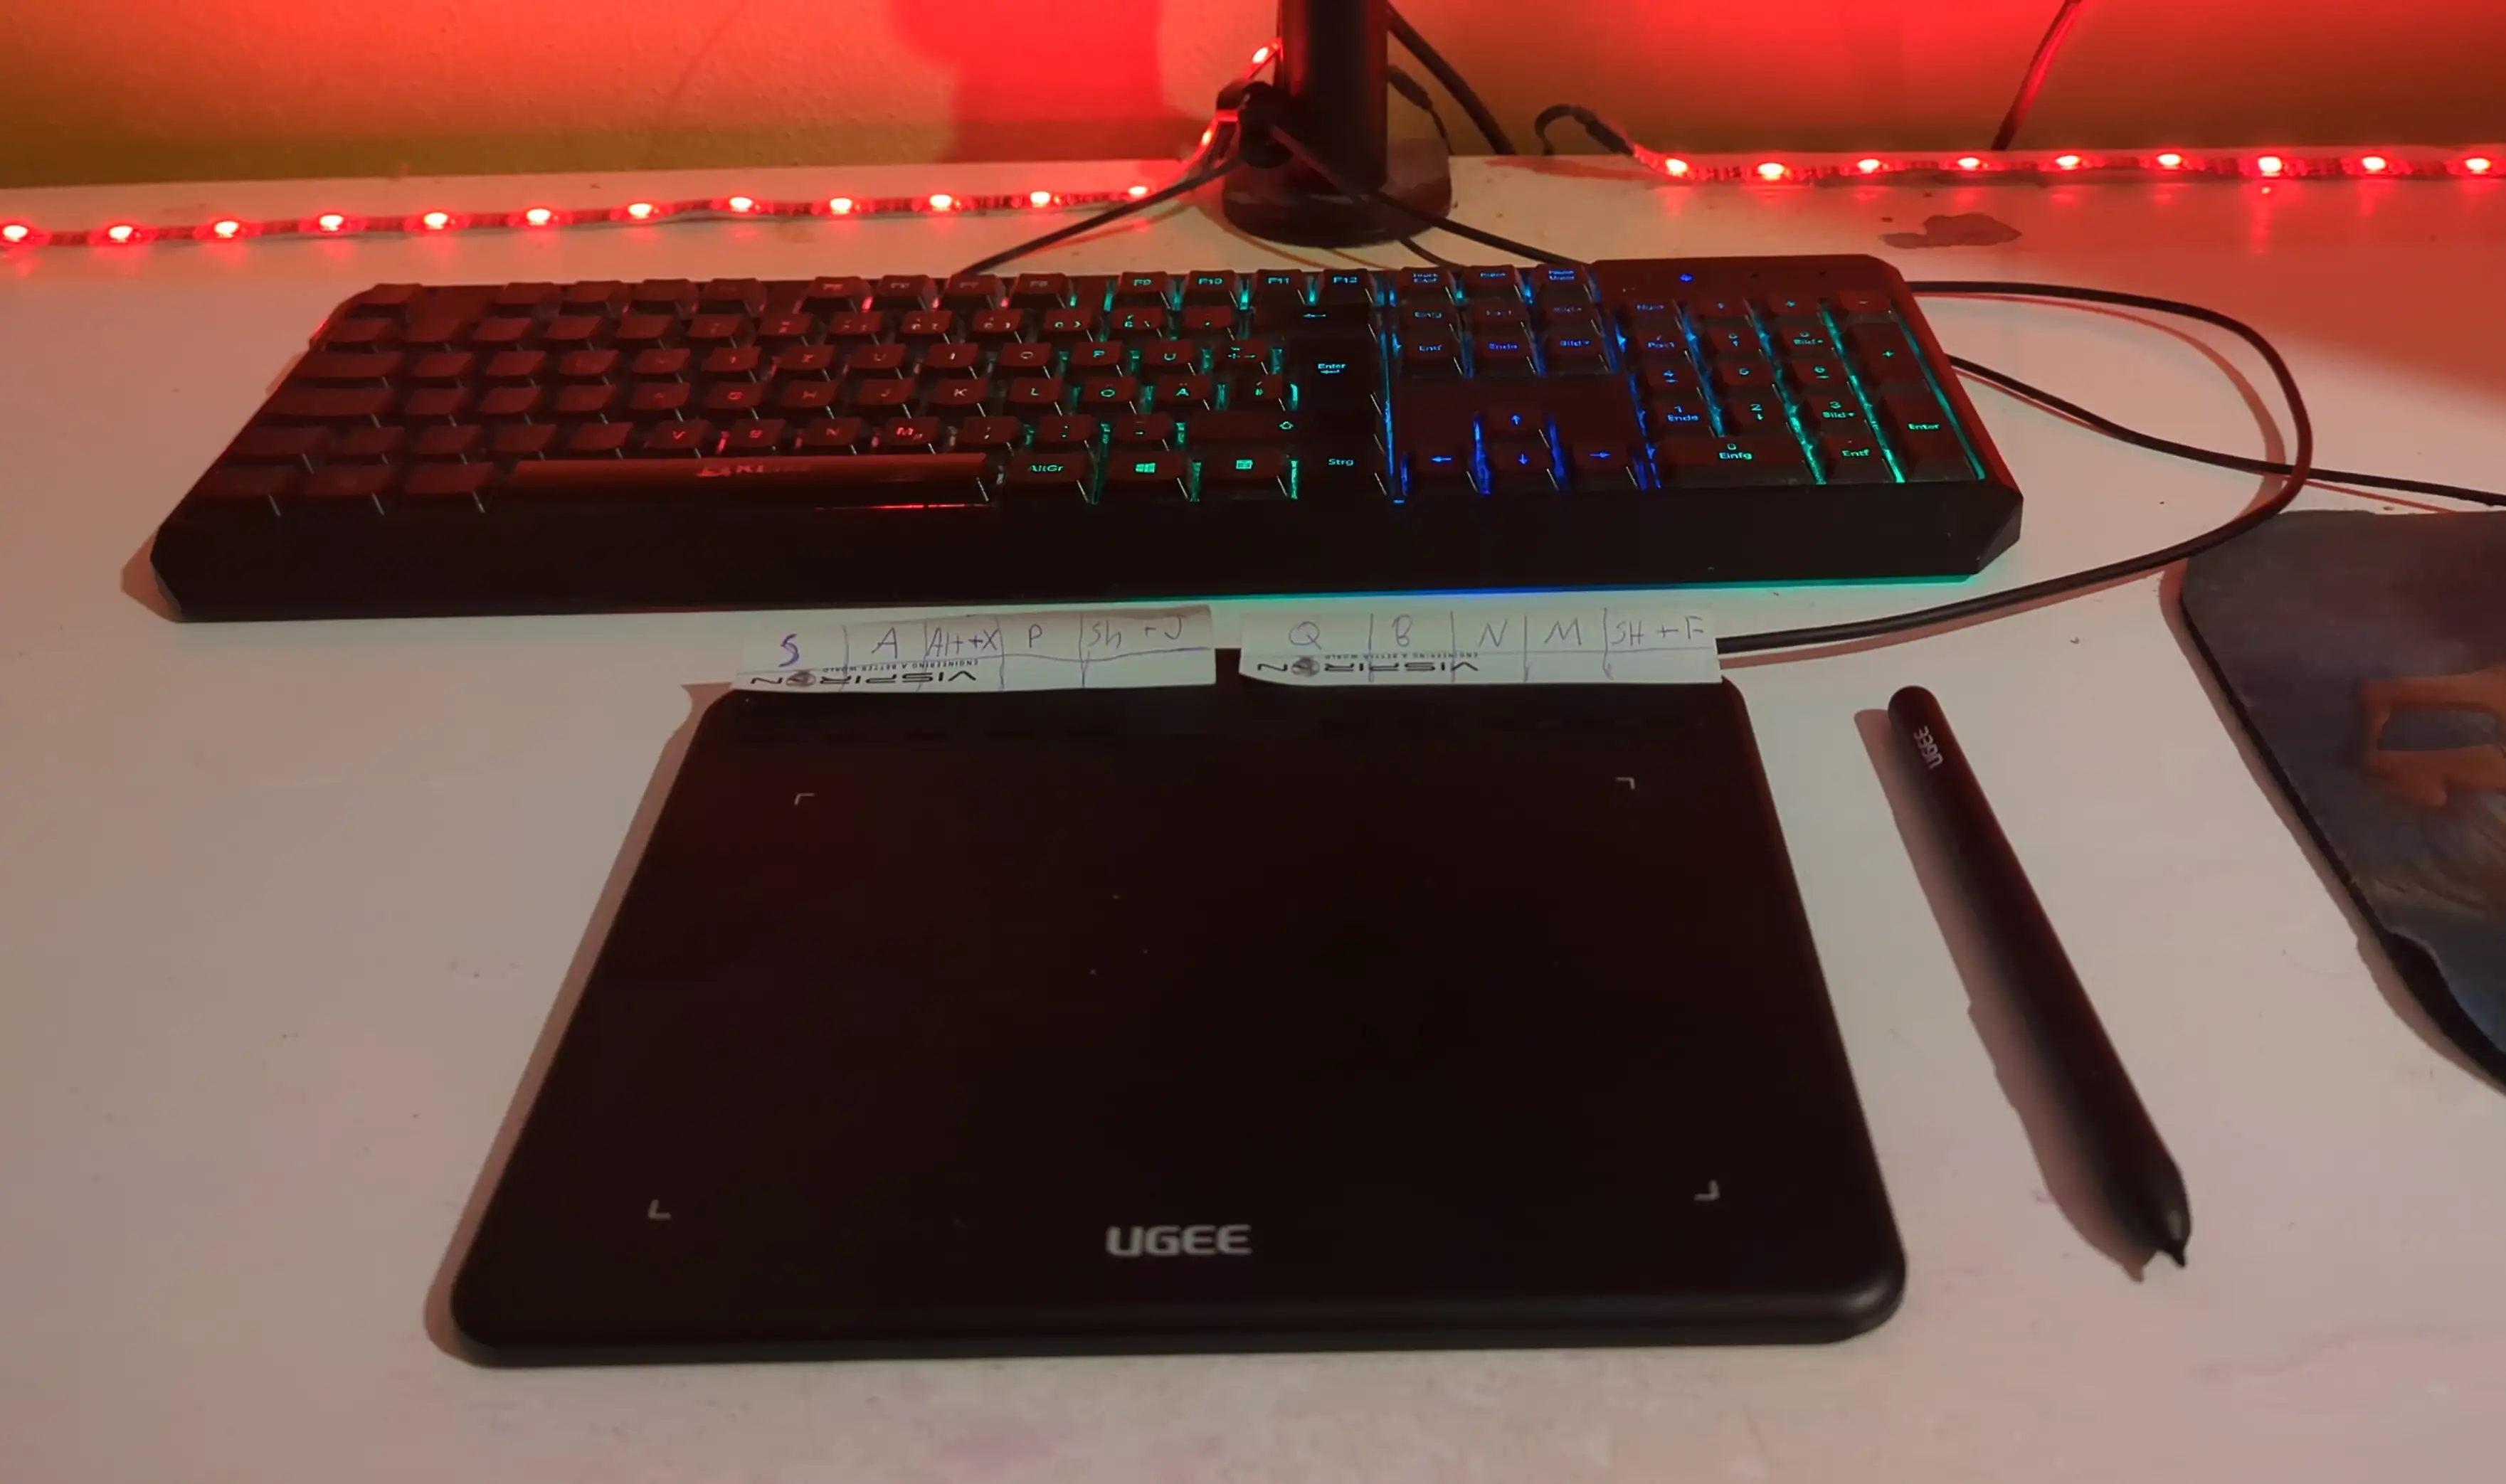
Further we recognised that setting up shortcut keys that are bound to the bottom letter row on the keyboard might be redundant, since the distance to the tablet shortcut keys or keyboard is about the same.
FastDraw hints
In general when mapping, one should be familiar with the union and division concepts.
- Union: to combine overlapping areas or
Shift+J. - Division: to divide an area into two or
Alt+X.
Thus when fast drawing, draw the biggest area first and then draw the various division lines. This will void the need to select multiple nodes when creating a neighboring area.
Case: drawing a neighboring area with a lot of nodes
This is a simple example to highlight the process.
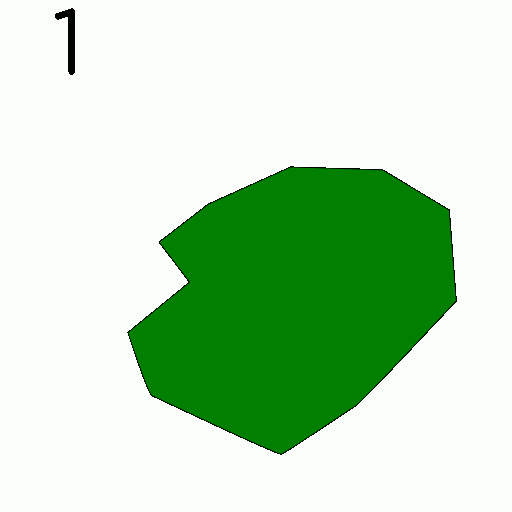
- Let's say a given area exists (shown in green).
- Draw a new area that overlaps the existing area (shown in pink).
- Make sure that both areas share two nodes (shown in blue).
- Select the two nodes and the green area.
- Split the way with
P.
- This will give us a new way (shown in red).
- Make sure remove any key-value pair of this new way.
- Otherwise the next steps won't work.
- Select the red line and the pink area.
- Now divide the area into two with
Alt+X. - This will give us two new areas: pink and yellow.
- The pink one is completed and can proceed with tagging.
- The yellow one is dangling (incomplete) just like the green area.
- Finally select the open green area and yellow.
- Unionize them with
Shift+J. - (They are overlapping, since they share the same nodes, the two blue nodes from earlier.)
One can question at which count of nodes does it make sense to use this process. We usually first apply this technique when dealing with more than 10 nodes.